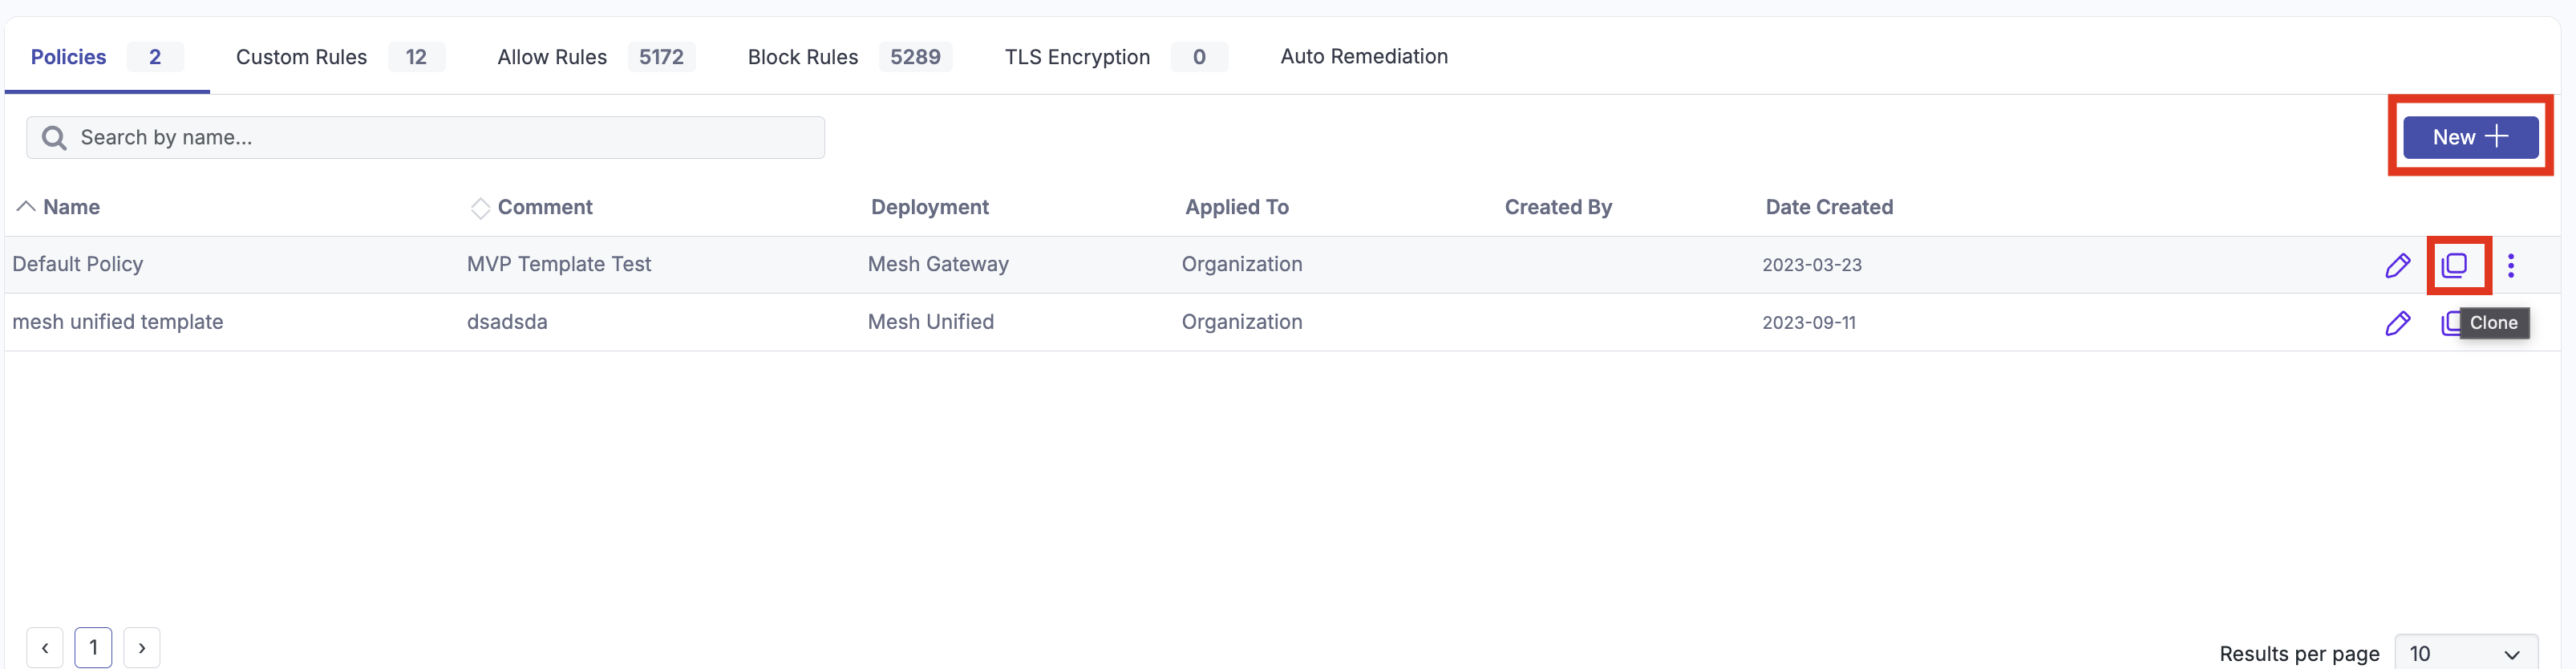
Step 1a: Click New
Navigate to the "Policy" page and select ‘New’.
Alternatively, select the “Clone” option to duplicate an existing policy.
At the Partner Level, only a template can be created but can be cascade down to customers. More info: Updating Policies from MSP Level
Step 1b: Select Organization/Domain/User The Policy Will Apply (Customer view)
Select if you are applying the policy to the “Organization”, “Domain”, or a particular “User”.
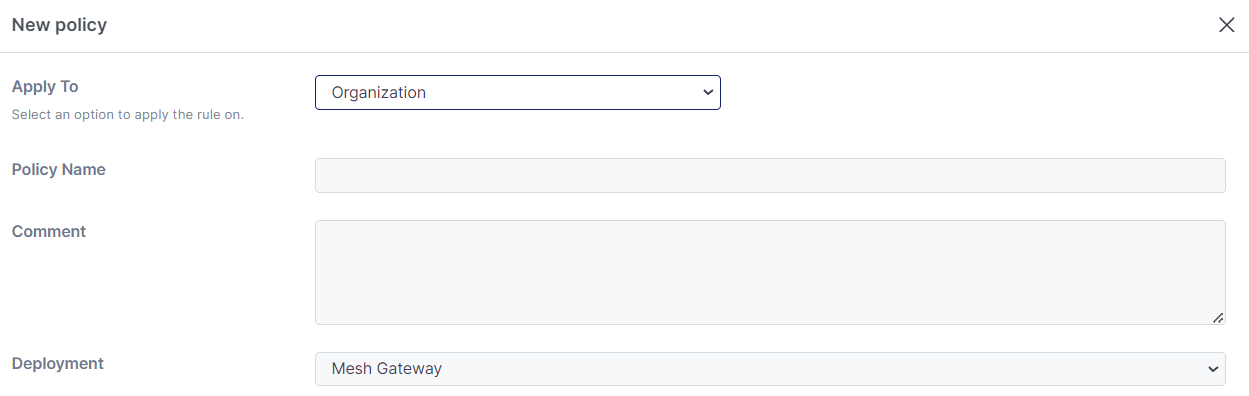
Step 2: Fill in name and description
Enter a "policy name" and "description".
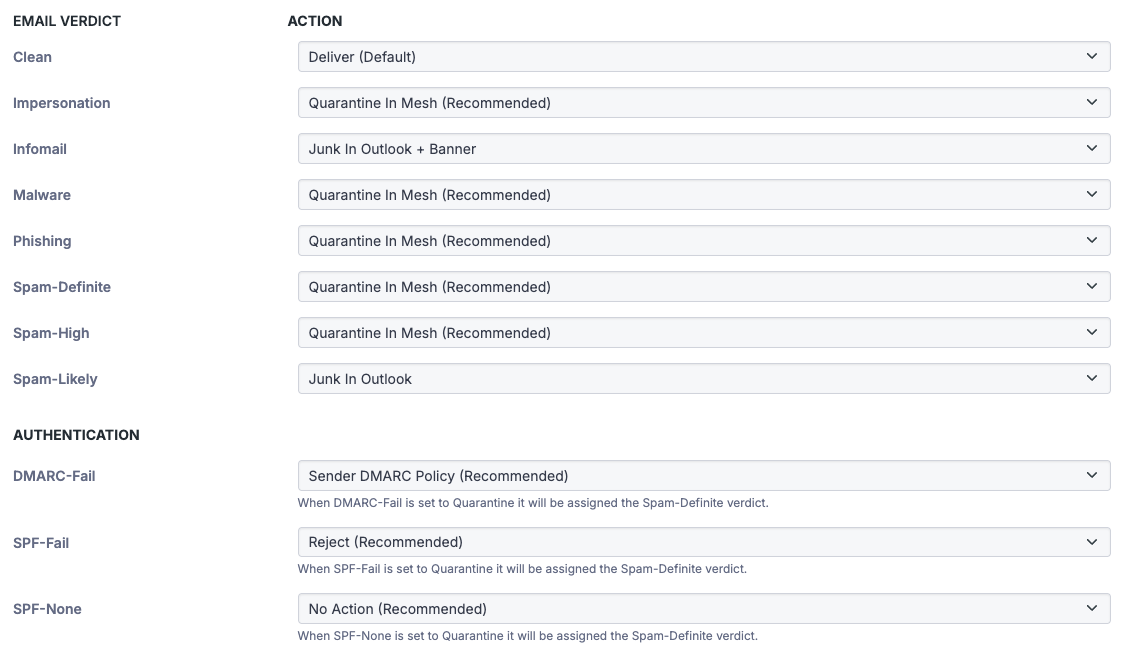
Step 3: Define the policy actions for email verdicts and authentication
Configure the policy by setting the action that will be applied for each verdict and connection level authentication. You can see our suggestions for best practices here:
Step 4: Configure Banned Attachments and Geo Filter
Banned Attachments
Attachment extensions are grouped into the following categories: Executable, Encrypted, Video, Audio, Compressed, Macros, and HTML.
If an email contains an attachment that is part of the selected group, the selected action will be applied.

The Banned Attachments verdict can only bypass the policy action through a Custom Rule. More info: https://docs.emailsecurity.app/help-center/creating-a-custom-rule
Geo Filter
Geo-filtering is based on Geo-Location OR the envelope-from Top-Level Domain (TLD). This can be useful to filter quarantine or junk email from locations that customers do not frequently contact or from regions known for high volumes of spam.

Step 5: Advanced Settings

Cold Outreach:
The Cold Outreach toggle allows you to filter unsolicited marketing and sales emails more aggressively.
Enabling this slider may increase false positives, so it is recommended for use in user specific policies (C-suite, managers, directors) or circumstances where an organisation wants to reduce this type of content as much as possible.
Zero Trust:
The Zero Trust toggle allows you to achieve a “quarantine by default” approach to email. Clean and Infomail verdict will be reclassified as Spam-Likely unless sent from a known contact or allowed sender. It is useful in situations such as a Mail Bomb attack.
A “Known Contact” is a sender the recipient has previously sent outbound emails to.
Using Mesh Unified or Mesh 365, we identify these automatically. For the Mesh Gateway, using our Outbound Smarthost is required.
It is necessary to have our “Infomail” and “Spam-Likely” verdict to “Quarantine in Mesh” or “Junk in Outlook” to utilize this feature.
Spam Filtering Sensitivity:
This feature increases or reduces the threshold of our “Spam Likely” verdict of the spam filtering. This can be useful if you require filtering to be more or less restrictive for everyone or for certain mailboxes.
-
Low will quarantine emails with a spam score of 7.5 as “Spam-Likely”
-
Medium is our default setting. It will quarantine emails with a spam score of 6.25. Emails with this score fall into our “Spam-Likely” category.
-
High will quarantine emails with a spam score of 5.0 as "Spam-Likely".
You can see our spam score thresholds in our best practice guides: