Overview
Allow Rules can be created to permit specific sender addresses or domains to bypass specific filters within Mesh.
For security reasons, allow rules do NOT bypass phishing, malware, or banned. To bypass these verdicts, you need to create a custom rule
|
Email Verdict |
Bypassed by Allow Rule |
Bypassed by Custom Rule |
|---|---|---|
|
Spam |
Yes |
Yes |
|
Infomail |
Yes |
Yes |
|
Impersonation |
Yes |
Yes |
|
Policy - Geo |
Yes |
Yes |
|
Policy - Banned Attachment |
No |
Yes |
|
Malware |
No |
Yes |
|
Phishing |
No |
Yes |
Allow Rules Can Be Applied
-
Globally - for all or selected customers under an MSP
-
Organizationally - for a specific customer
-
Domain - for a specific domain
-
Users - for specific users or mailboxes
Step 1: Select "New +"
Click "New+". A popup window will appear.
Step 2a: Select Customers To Whom The Rule Will Apply (Partner view)
Click “Select All Customers” or select what customers you would like to apply the rule.
Step 2b: Select Organization/Domain/User To Whom The Rule Will Apply (Customer view)
Select if you are applying the rule to the “Organization”, “Domain”, or a particular “User”.
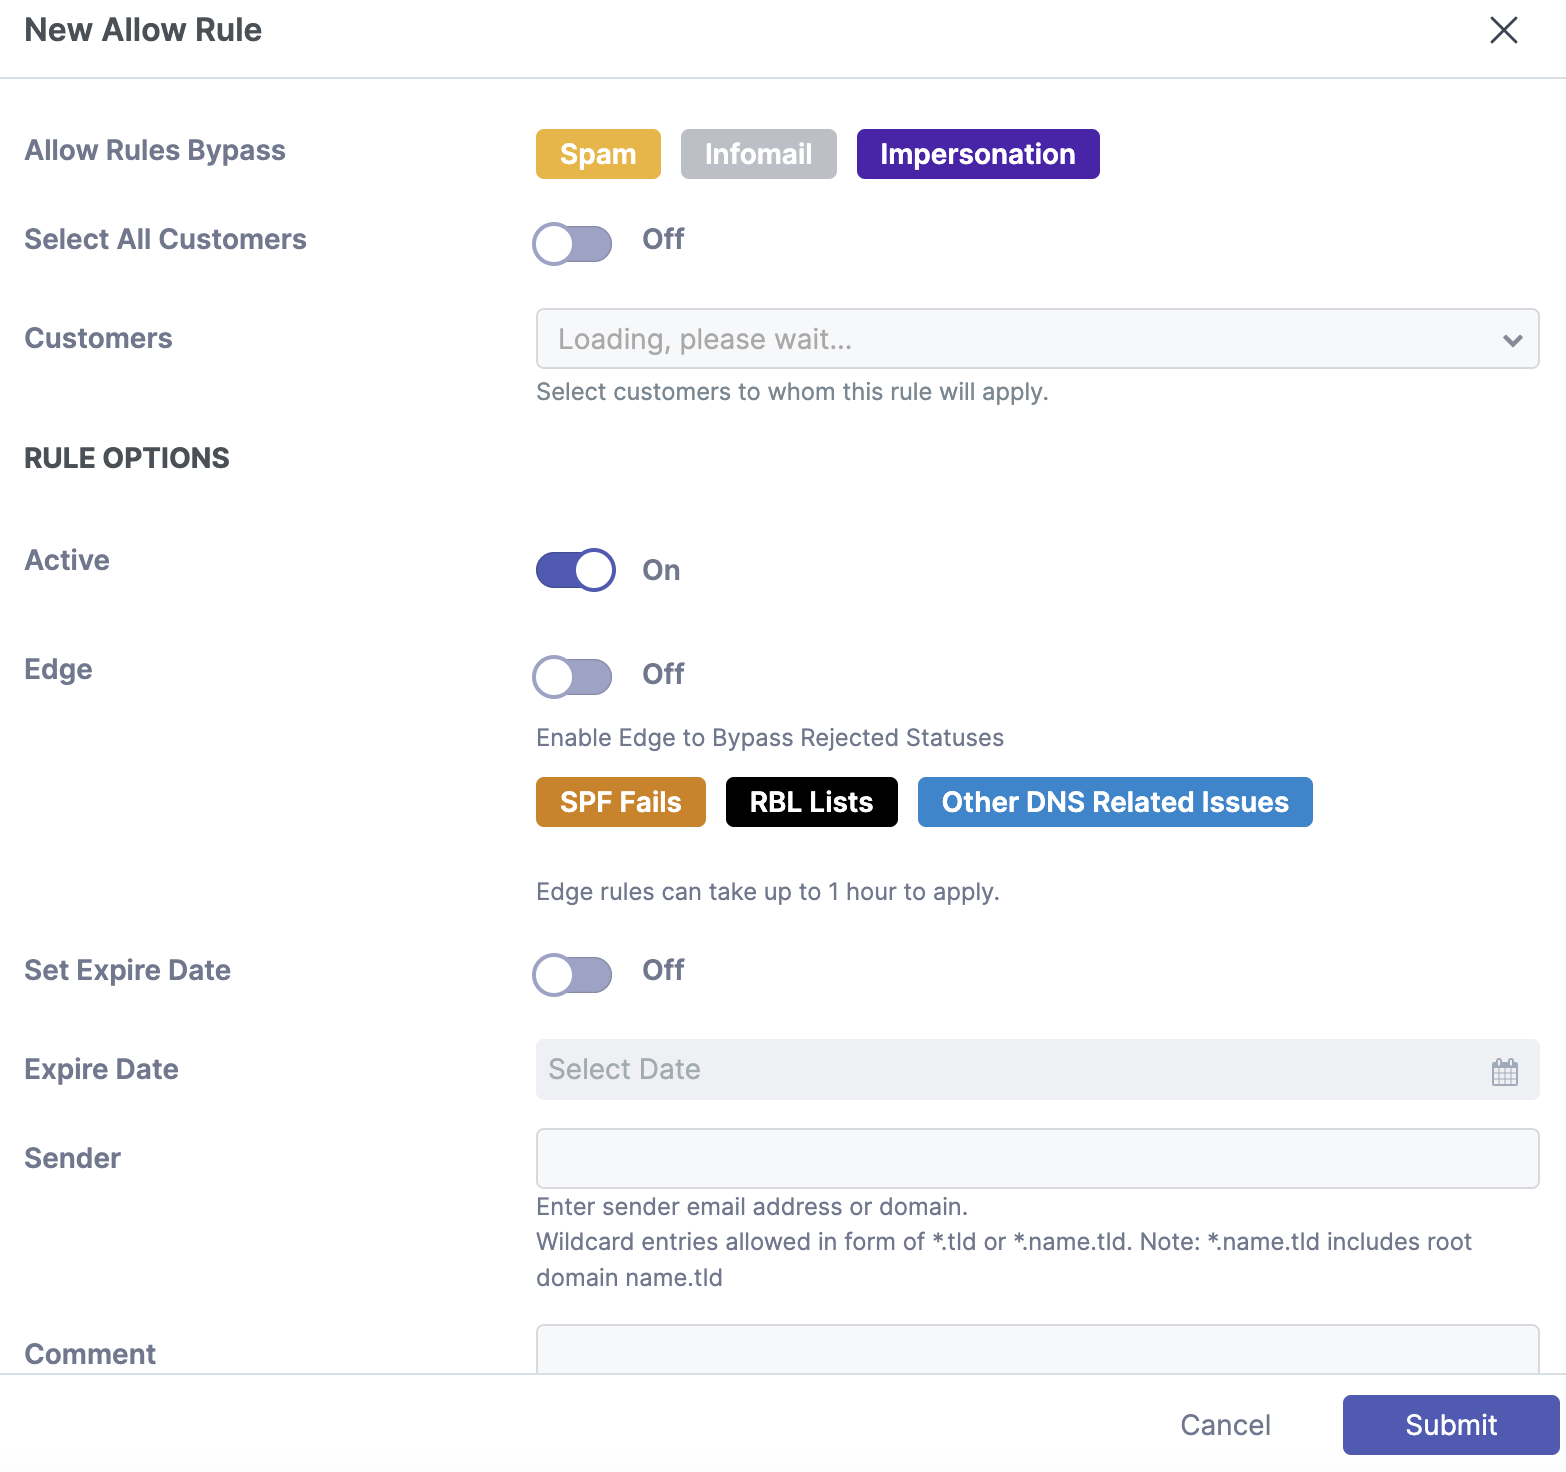
Step 3: Set The Rule Options
Rules will trigger if the header-from OR envelope-from matches the entry.
To allow a sender, enter the email address as shown below
sender@example.com
To allow a domain AND all subdomains, enter the domain as shown below (do not include the '@' symbol)
example.com
To allow a subdomain, enter the domain as shown below (do not include the '@' symbol)
subdomain.example.com
To create a wildcard entry, enter the rule as shown below. This example would allow emails from domains ending in .io:
*.io
Step 4: Enable Edge Slider (Optional)
The “Edge” slider should only be enabled if you wish to bypass SPF checks or DNS issues. For example, if an email is being quarantined as spam, you do not need to enable the edge slider. Enabling this unnecessarily can be a security risk.
Step 5: Submit
Click Submit to create the rule.