

Connectwise Manage
This is the suggested ConnectWise configuration. Always consult the ConnectWise documentation before making changes.
Step 1: ConnectWise Manage Configuration
Mesh Role
In ConnectWise, open System > Security Roles. You must create a new role named Mesh.
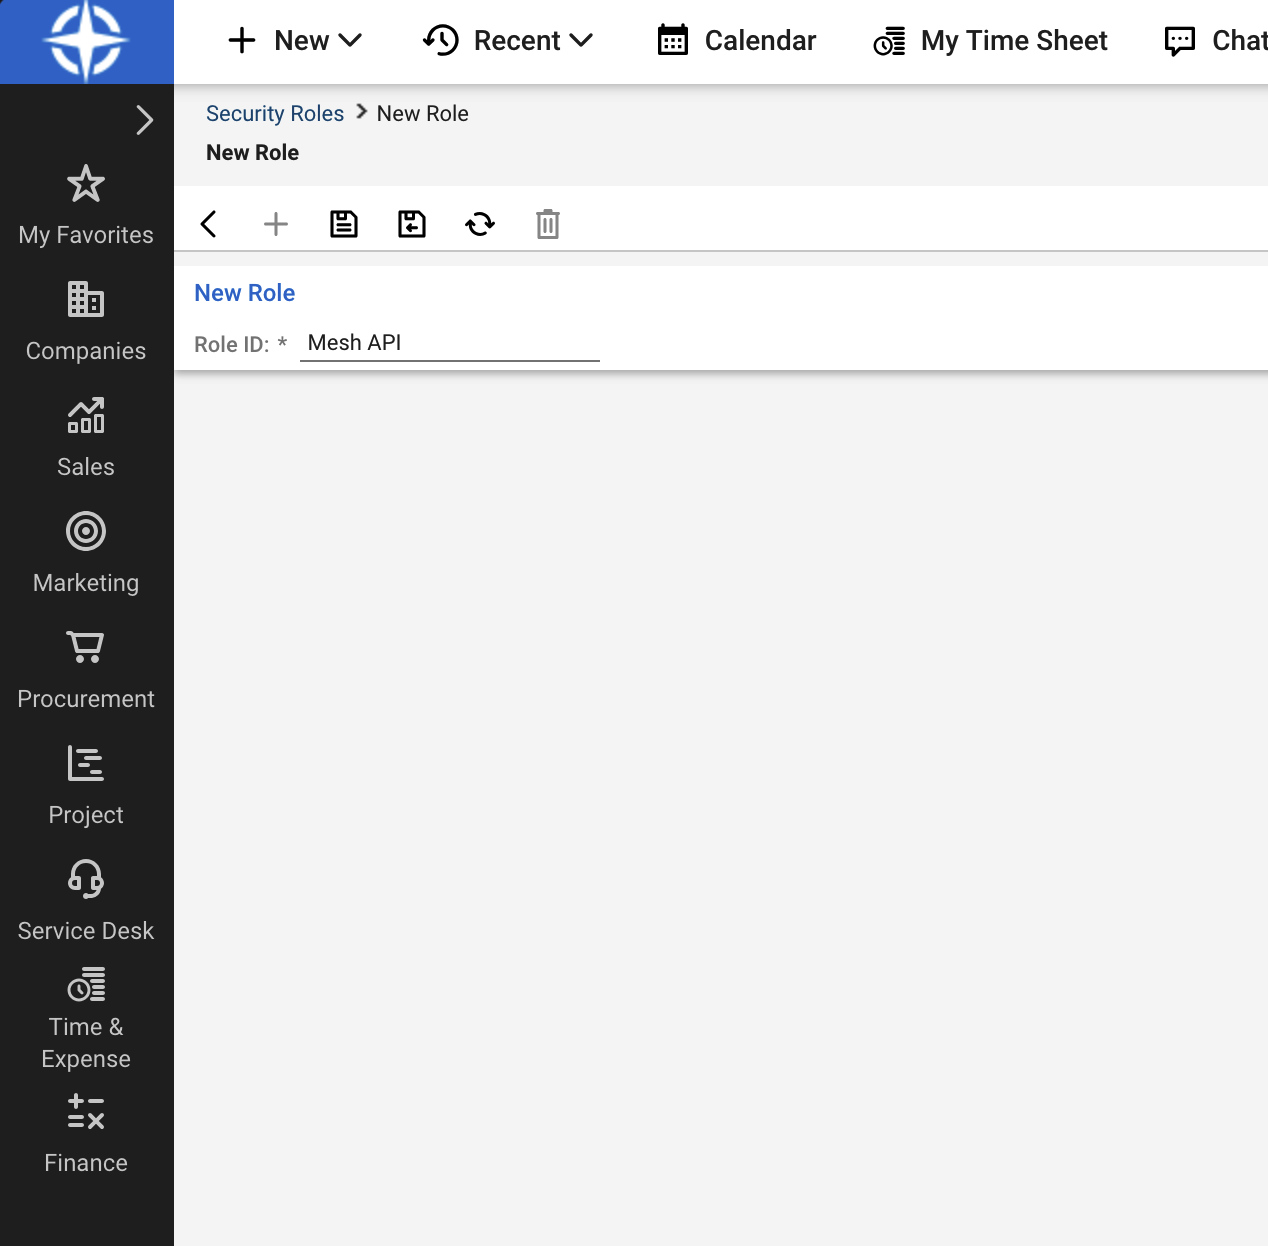
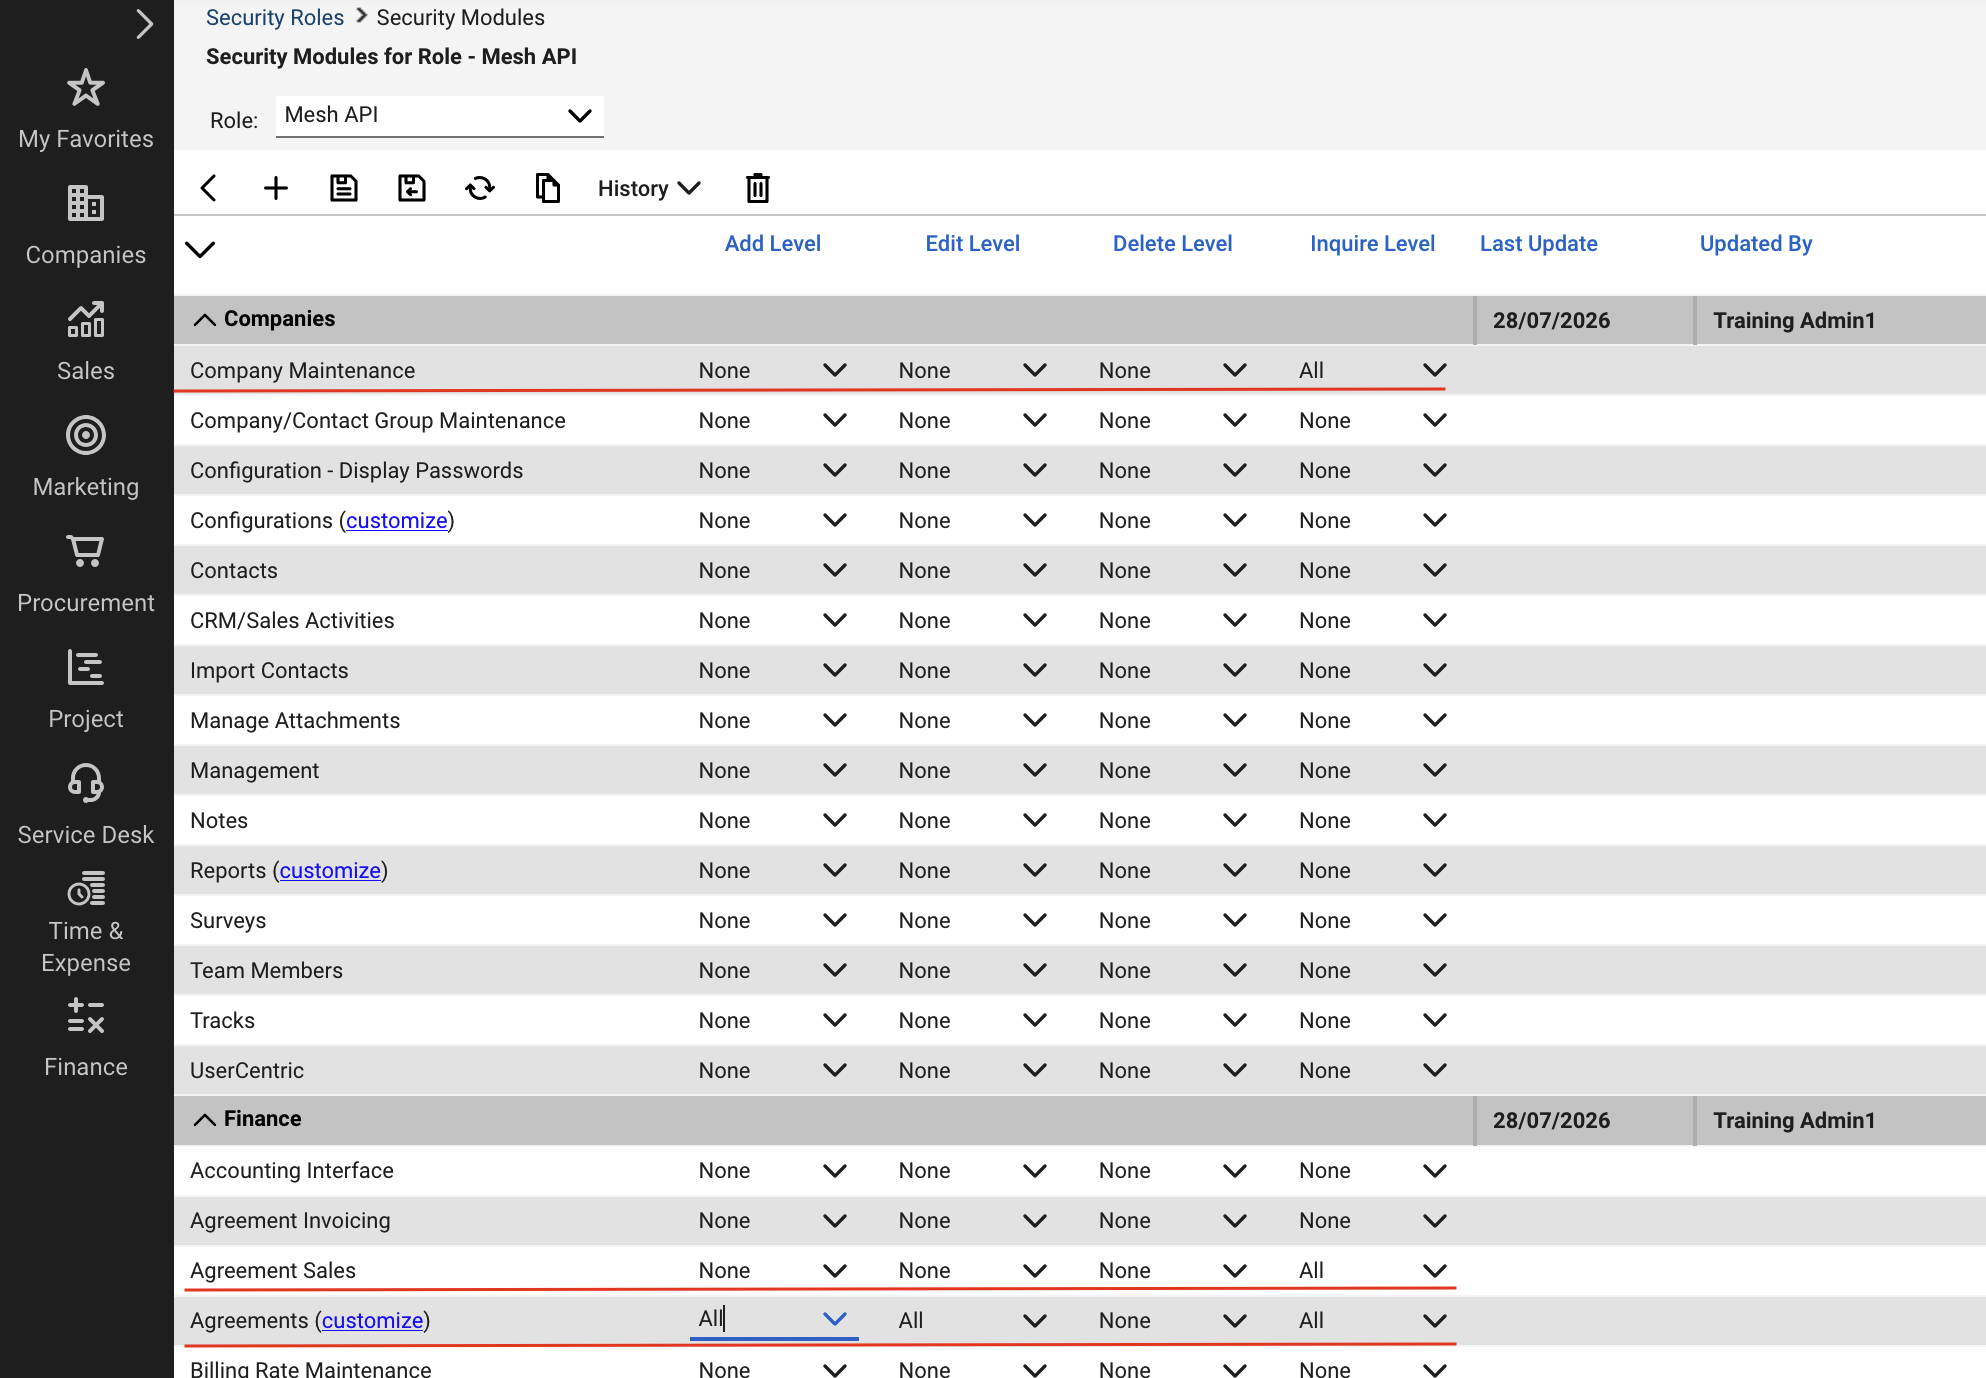
Once created, edit the permissions of the Mesh role enable the following options.
|
Resource Name |
Add Level |
Edit Level |
Delete Level |
Inquire Level |
|---|---|---|---|---|
|
Companies |
|
|
|
|
|
Companies Maintenance |
None |
None |
None |
All |
|
Finance |
|
|
|
|
|
Agreement Sales |
None |
None |
None |
All |
|
Agreements* |
All |
All |
None |
All |
|
Procurement |
|
|
|
|
|
Product Catalog |
None |
All |
None |
All |
|
Products |
None |
All |
None |
All |
|
Service Desk |
|
|
|
|
|
Close Service Tickets |
All |
All |
None |
All |
|
Merge Tickets |
All |
All |
None |
All |
|
Service Tickets |
All |
All |
None |
All |
|
System |
|
|
|
|
|
Table Setup* |
All |
None |
None |
All |
Mesh API Member
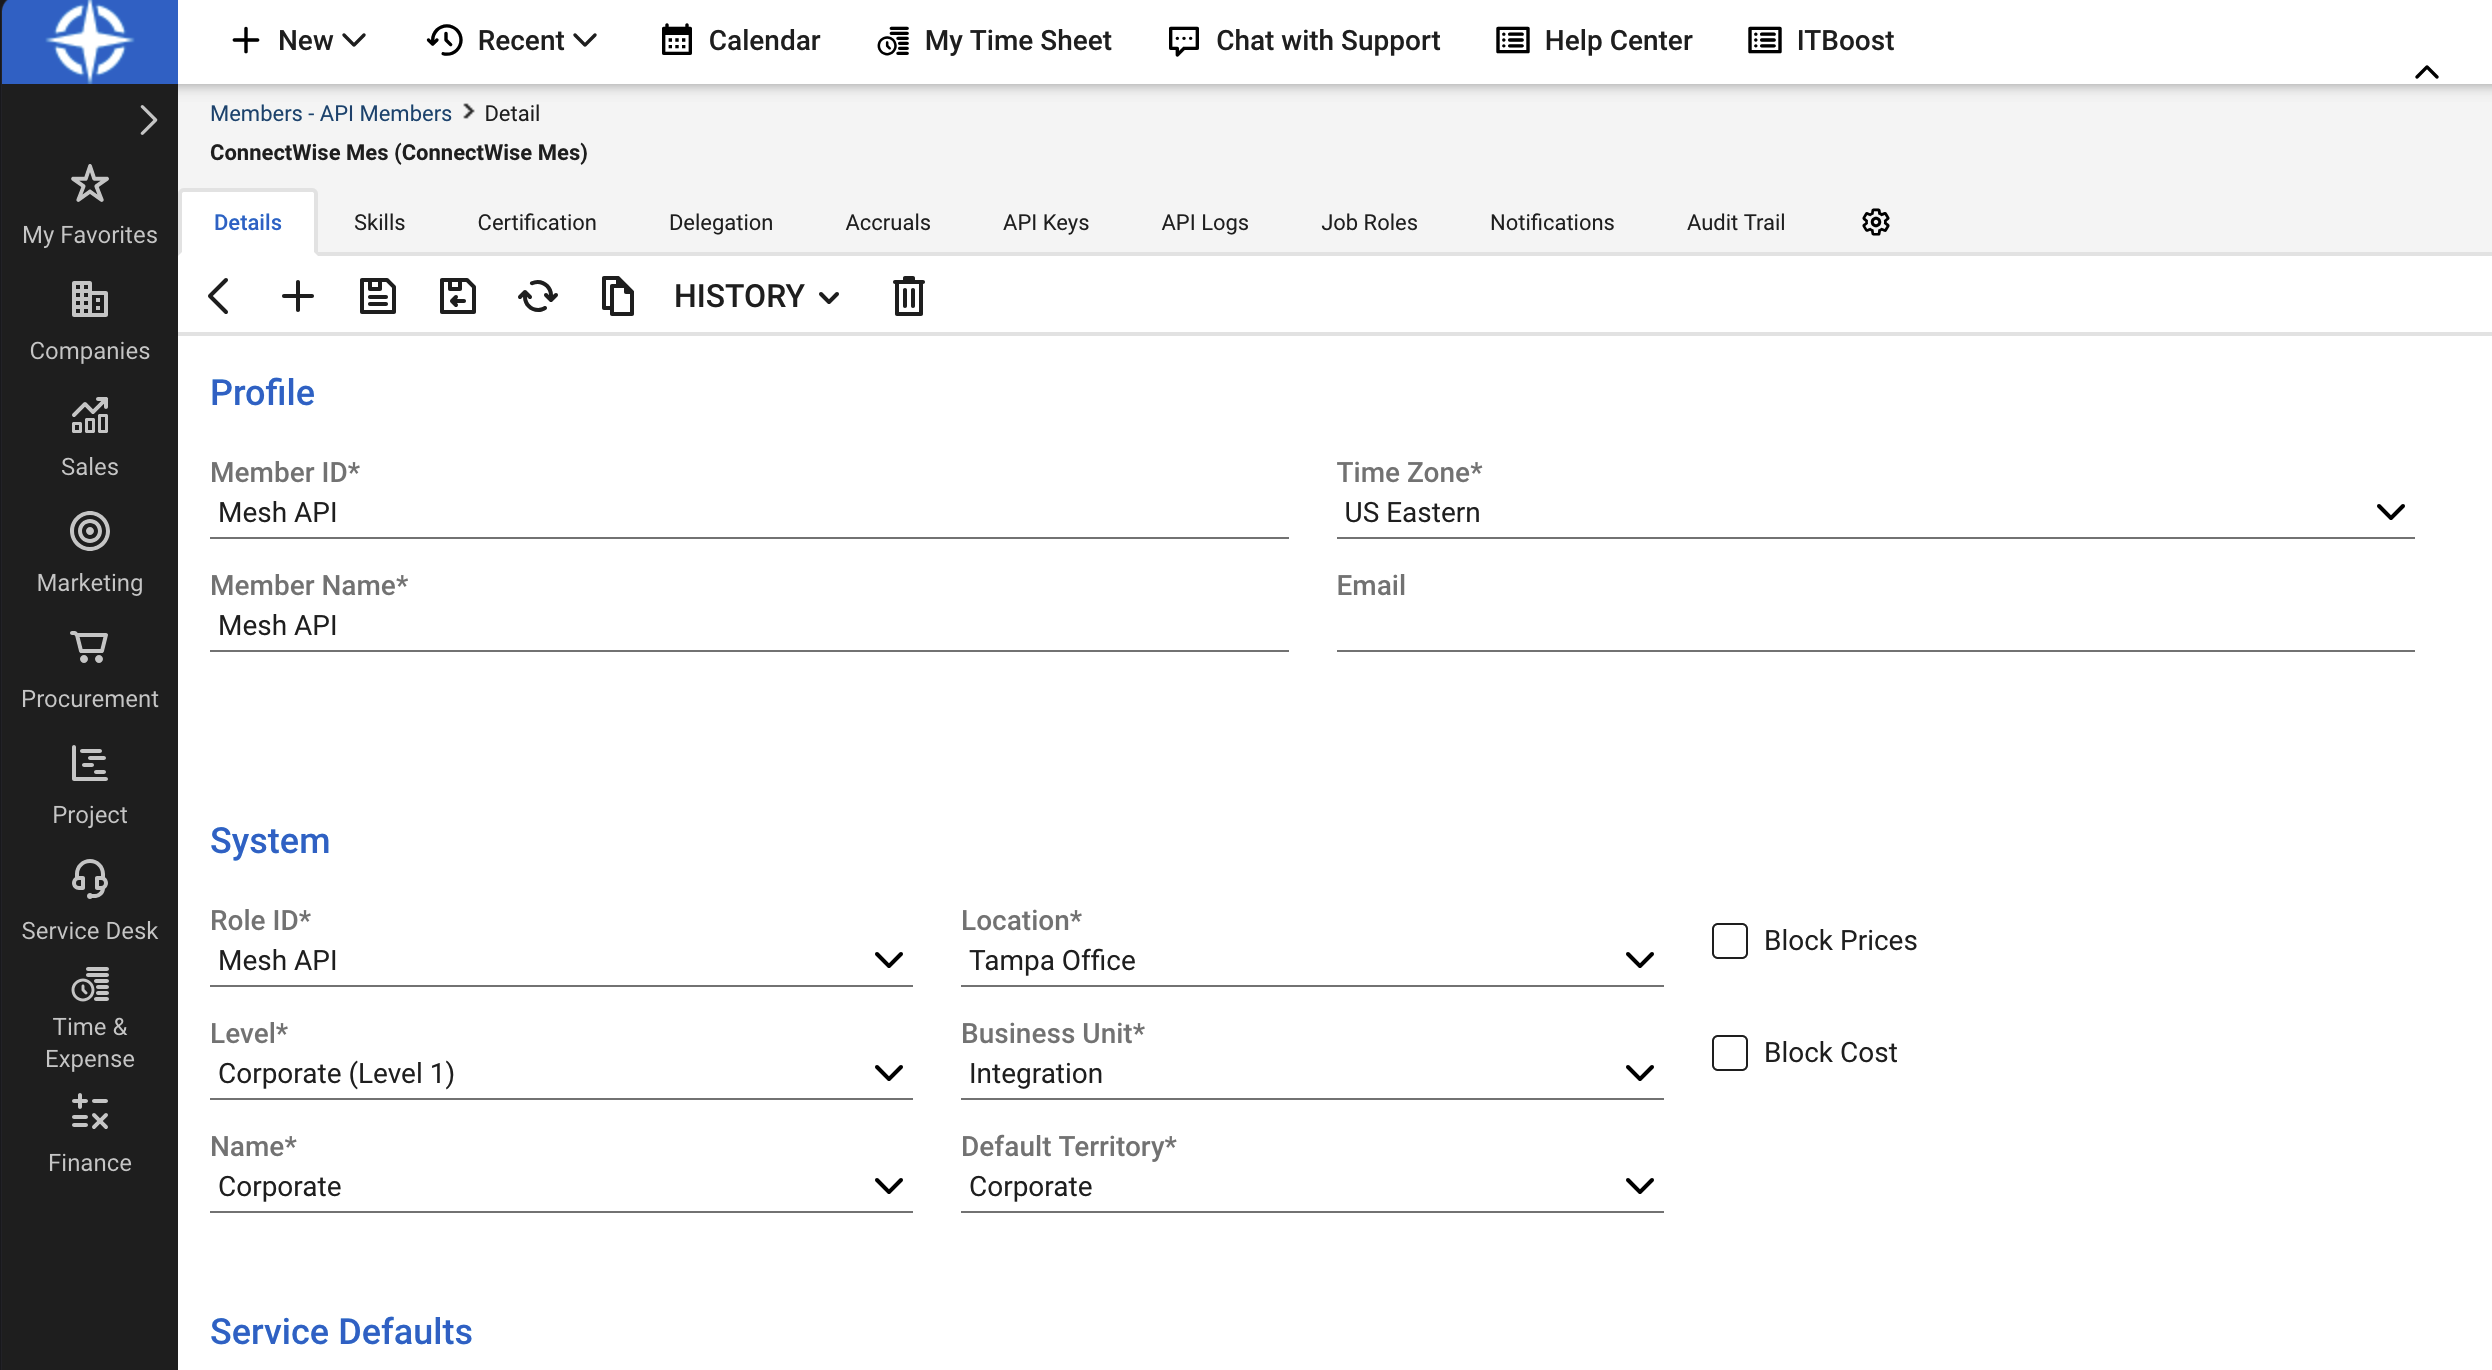
Next, we must create the Mesh Application. In ConnectWise, navigate to System > Members > API Members.
Create a new API member and for the Role ID field select the security role that we created in the last step.
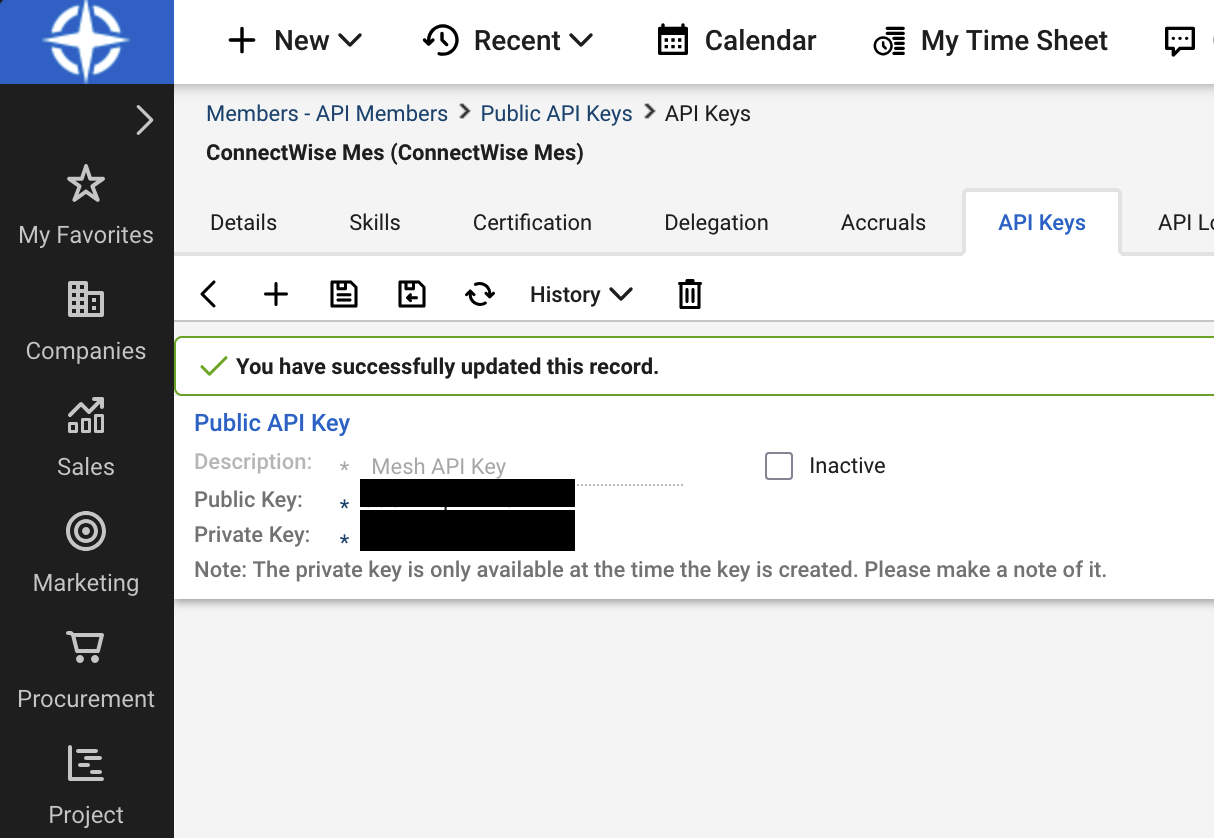
We must now generate a public and private key. Select “API Keys”, create new record, and your public & private key will be created. Please save these two keys as they will be required in the Mesh configuration.
Step 2: Select Connectwise Manage
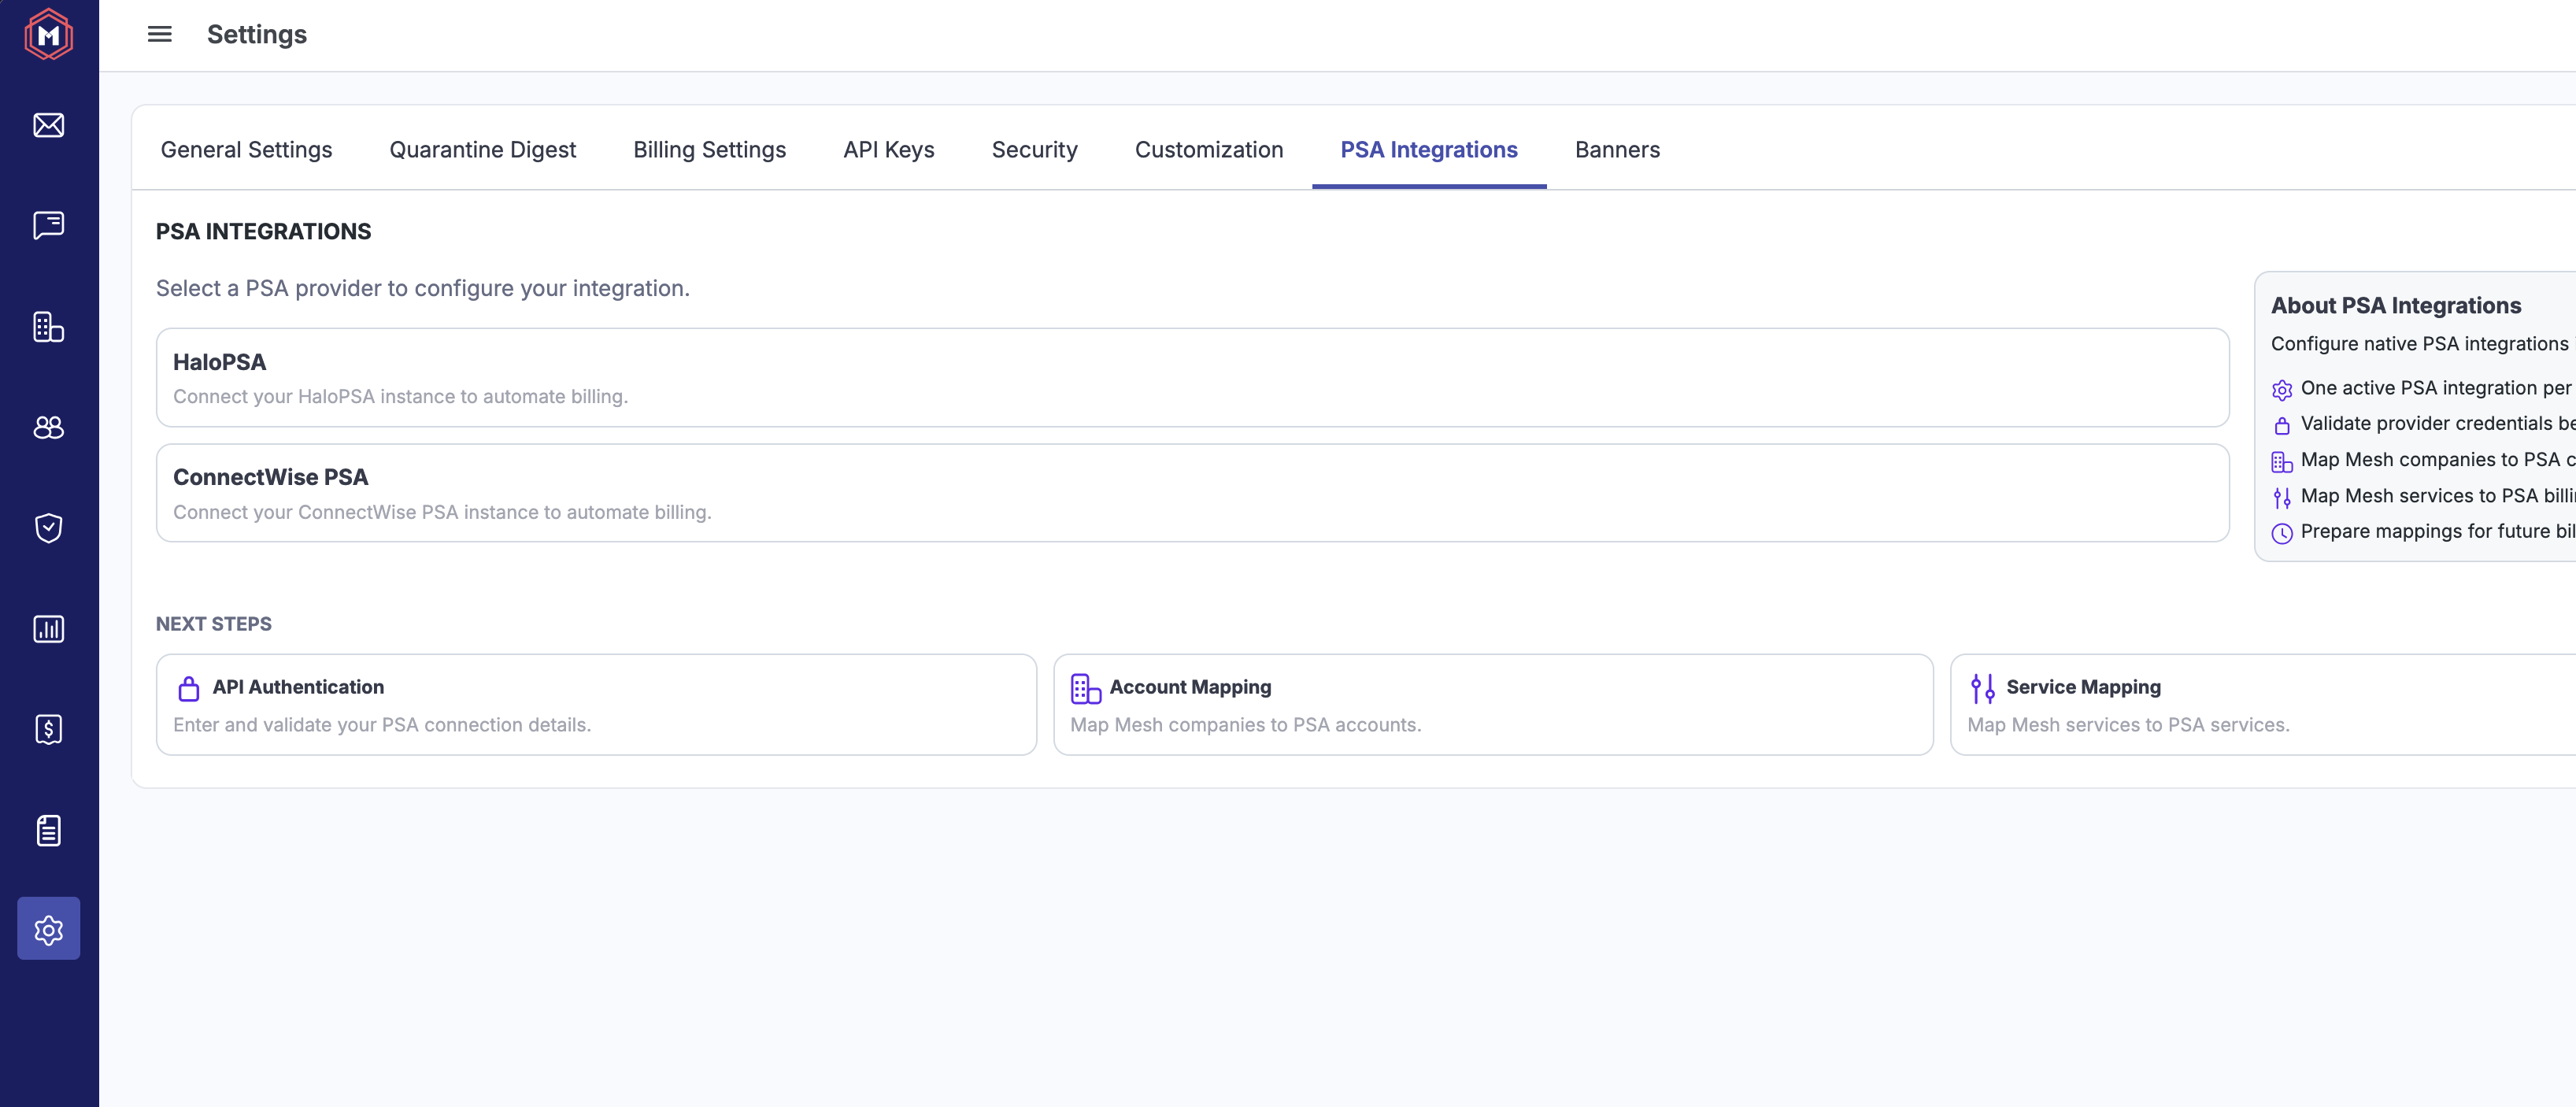
On the partner settings page within Mesh, select “PSA Integrations” and click “ConnectWise PSA”.
Step 3: Configure API Authentication
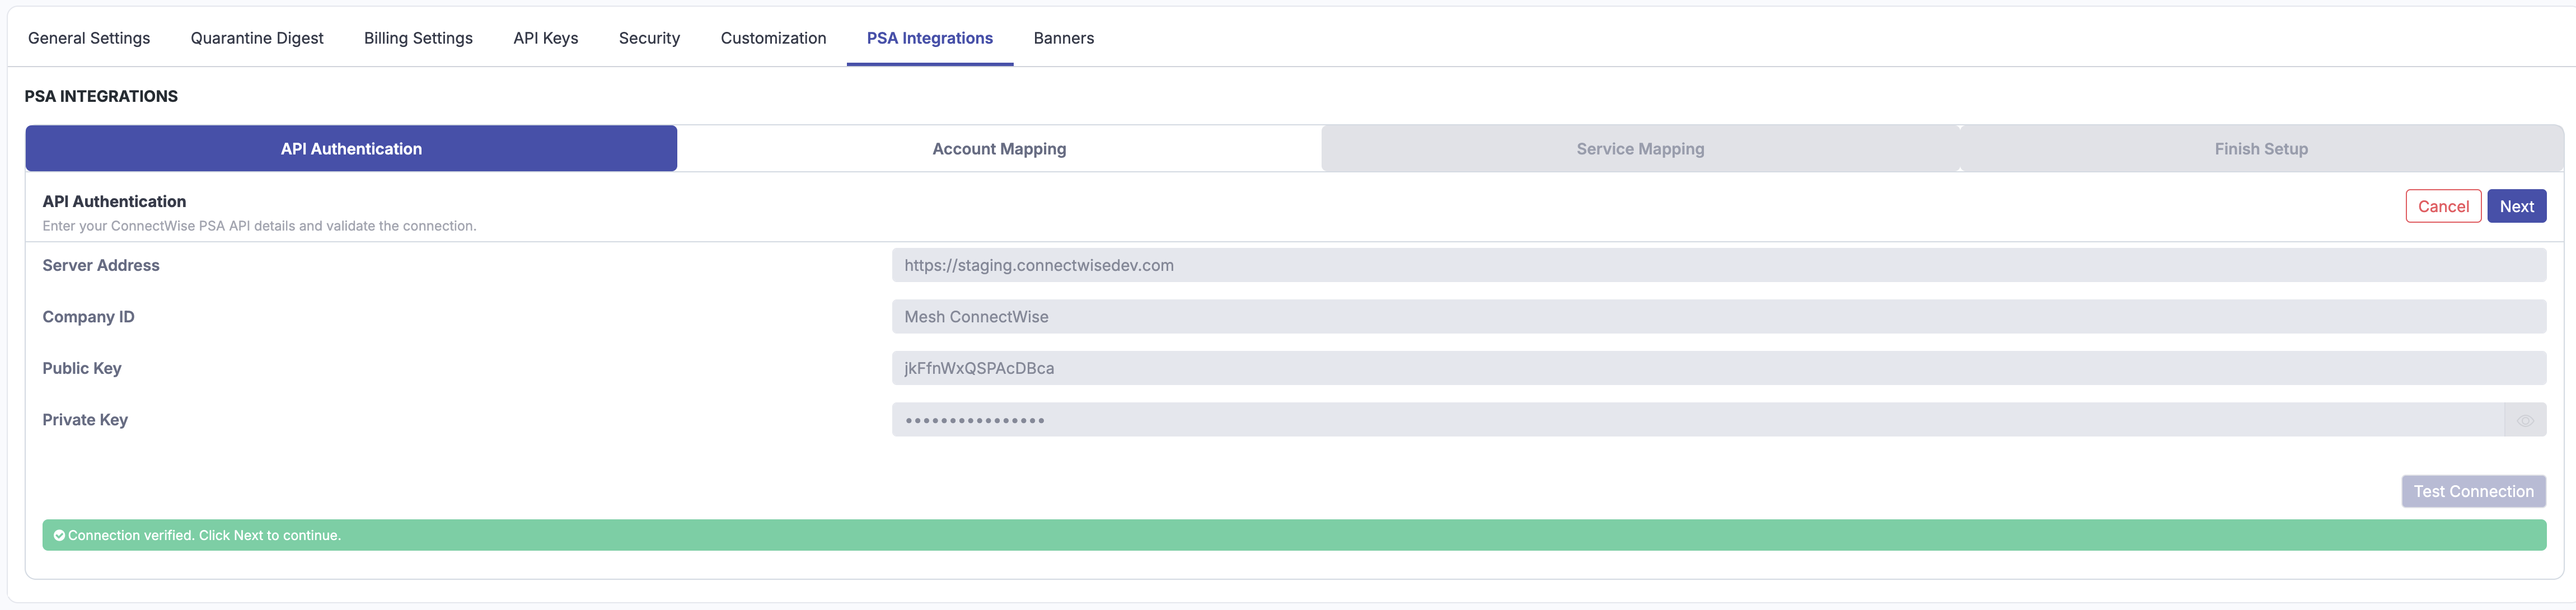
Enter the details found in the Mesh Application that you created within HaloPSA.
Server Address: Your resource server address i.e. https://example.connectwise.com
Company ID: Your ConnectWise company ID.
Public Key: This is the generated public key from the previous step.
Private Key: This is the generated private key from the previous step.
Once created, click “Test Connection” and click next once successful.
Step 4: Account Mapping
To associate each Mesh account to its corresponding ConnectWise client and invoice, you must first create a mapping. Once all mappings have an invoice selected, and the mappings are saved, you can continue to the next step.
The “Suggest Mappings” button will try to automatically associate the clients and agreements but these can be manually adjusted or specified if needed. The “Suggest Agreements” button can also be used by selecting an agreement type to automatically map to the relevant company.
Mapped: A client & invoice pair has been associated successfully.
Unmapped: No client or invoice selected.
Pending: A client & invoice pair is selected and needs to be saved.
Required: No agreements have been found for the selected ConnectWise customer. It must be removed from the selection to proceed.

Step 5: Service Mapping
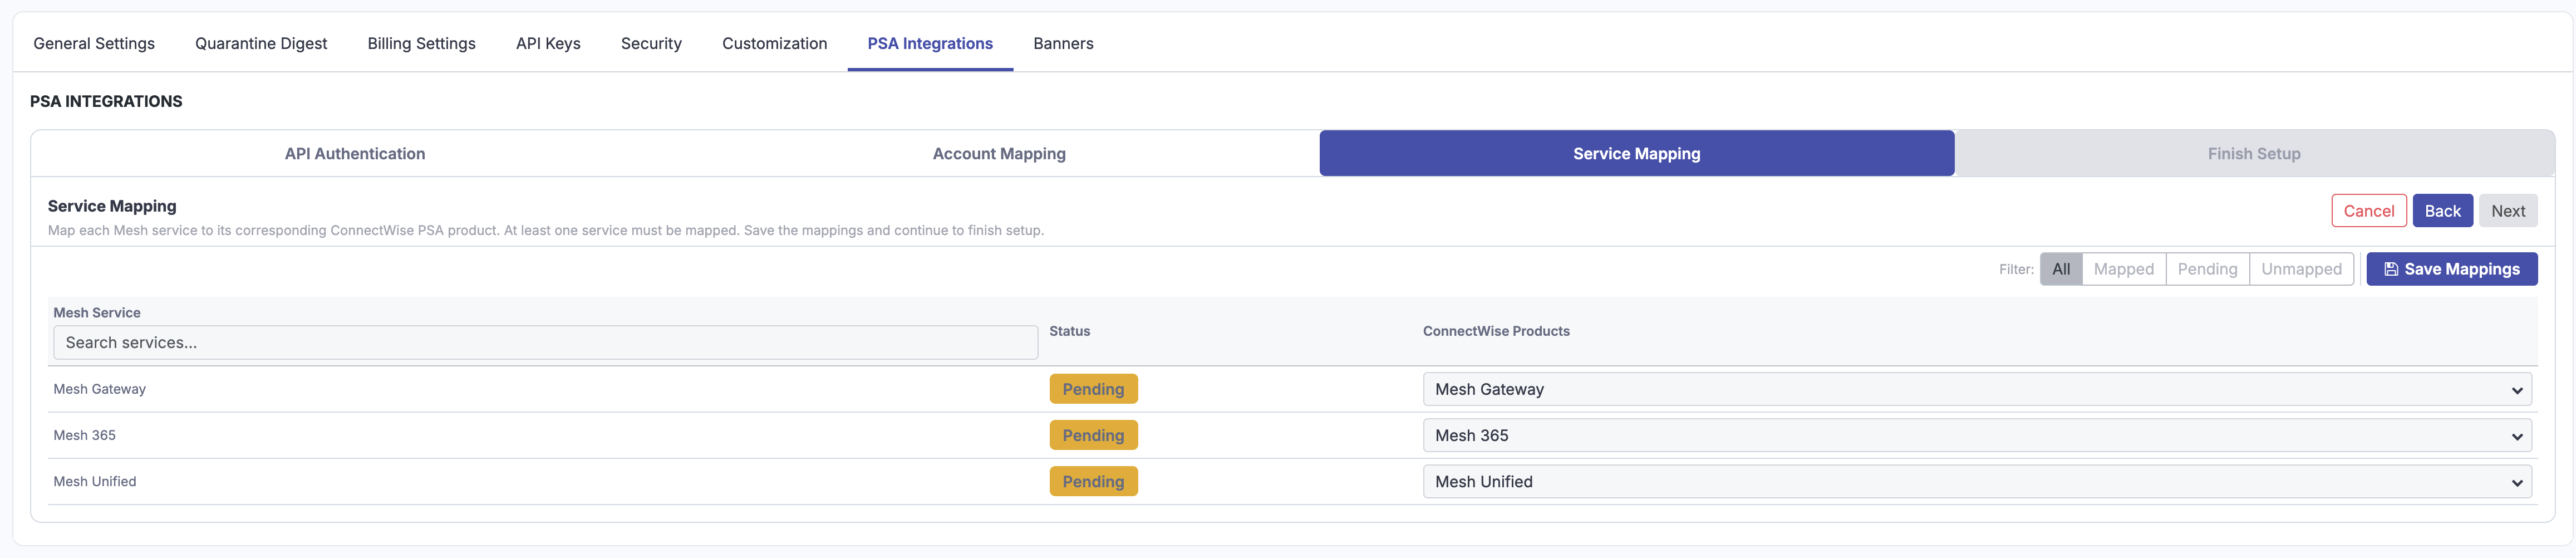
Map each Mesh service to its corresponding ConnectWise service or item. At least one service must be mapped to continue.
Step 6: Finish Setup
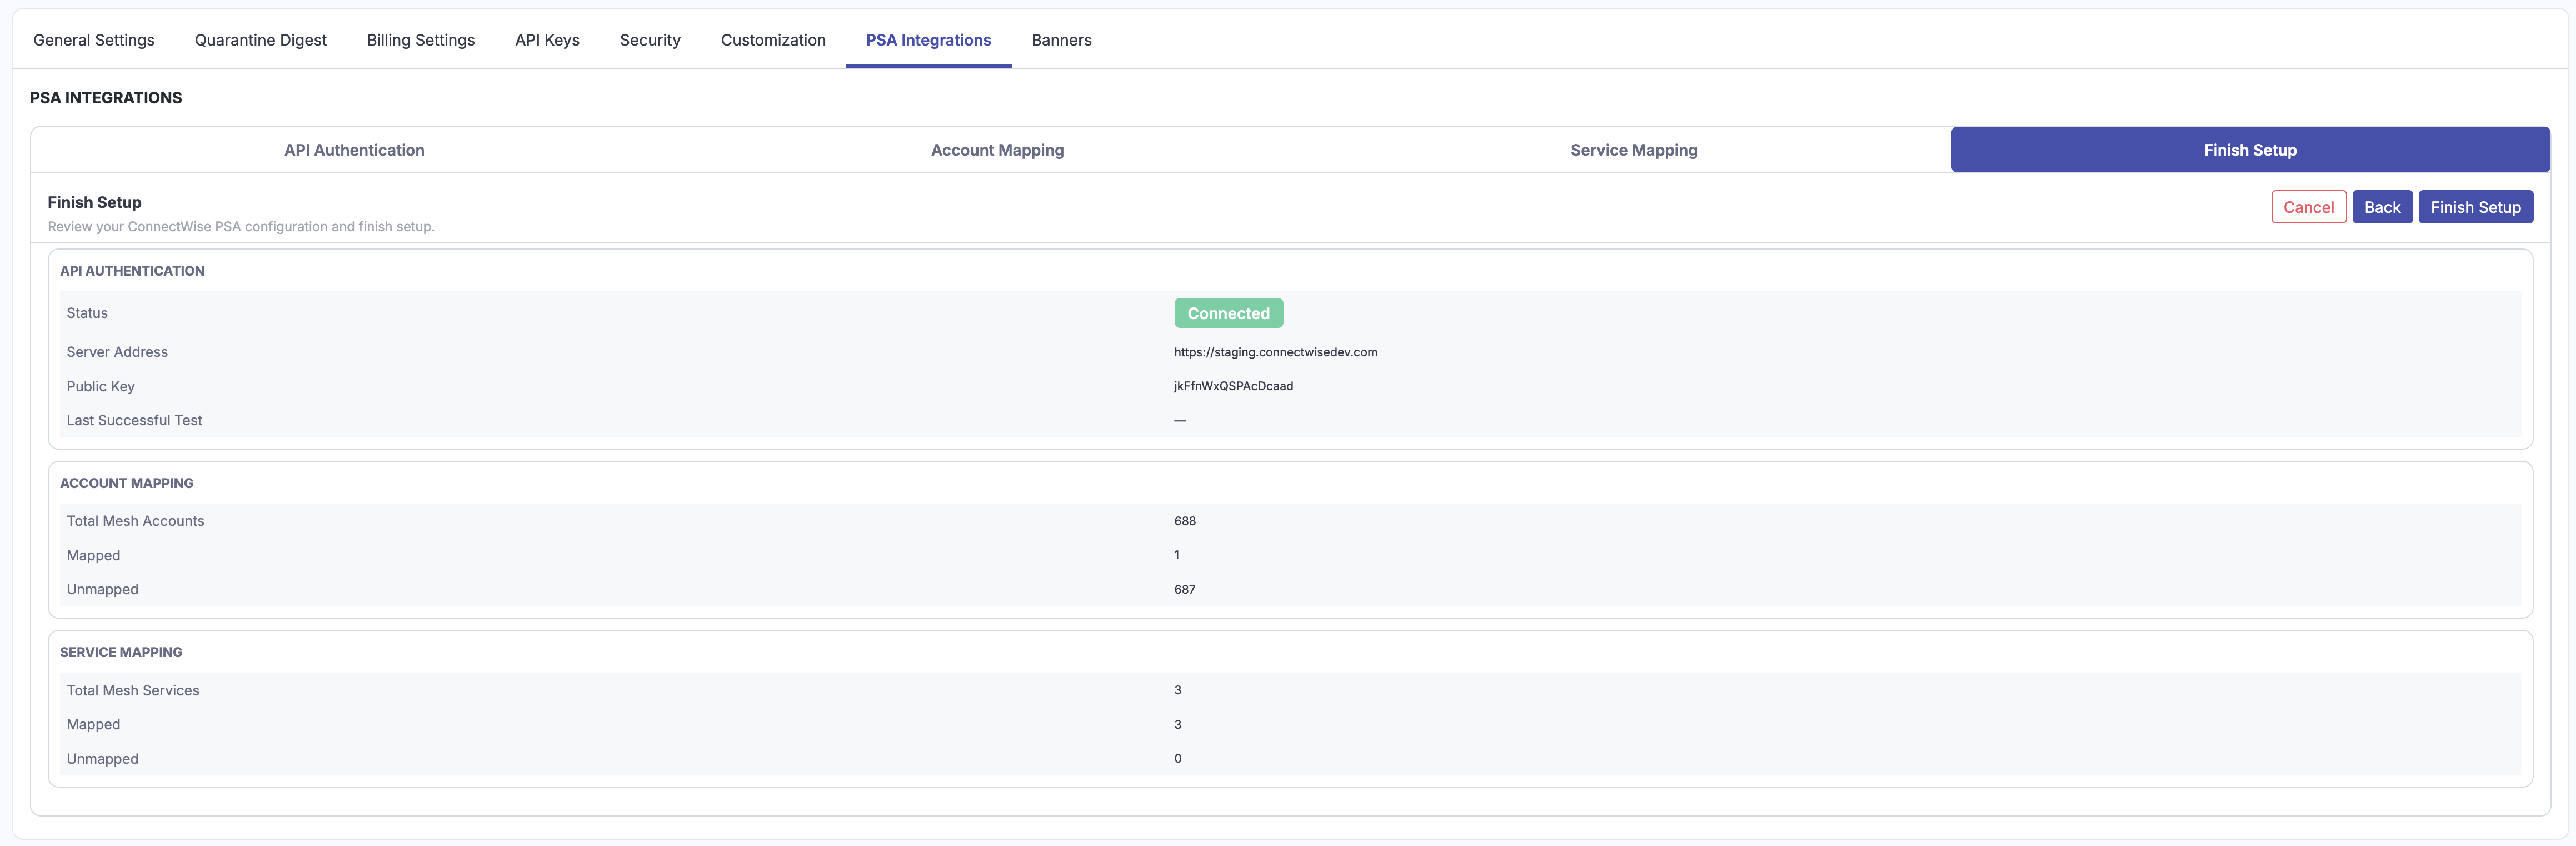
A summary page will be displayed showing information of the key details, last successful connection, number of accounts mapped, and number of services mapped.
-
API Authentication: Confirms the connection status, server address, public key, and last successful connection test.
-
Account Mapping: Shows total Mesh accounts, mapped accounts, and unmapped accounts.
-
Service Mapping: Shows total Mesh services, mapped services, and unmapped services.
Click “Finish setup” to confirm details.
Managing an Active ConnectWise Manage Integration
Usage data is synchronized to ConnectWise only after the corresponding customer has
been billed by Mesh. Customers who have not yet been billed, including those on trial, will not have usage data reported.
Billing usage updates may take up to 24 hours to appear in ConnectWise.
The figure imported to ConnectWise is the license count from the current month’s invoice.
Details shown
-
Server Address: The ConnectWise instance connected to Mesh.
-
Client ID: The ConnectWise API client currently configured.
-
Client Secret: The configured secret, shown as a masked value.
-
Configured On: The date and time the integration was configured.
-
Last Successful Test: The last time Mesh successfully validated the ConnectWise connection.
-
Account Mappings: The number of Mesh accounts mapped to ConnectWise customers/clients.
-
Service Mappings: The number of Mesh services mapped to ConnectWise services/items.
-
Last Sync: The most recent successful synchronization time.
-
Next Auto-Sync: A countdown to the next automatic synchronization.
Actions available
-
Test Connection: Validate that Mesh can still connect to ConnectWise using the configured credentials.
-
Manage Setup: Reopen setup so account and service mappings can be reviewed or updated.
-
Sync Now: Run billing usage synchronization immediately instead of waiting for the next auto-sync.
-
Sync Mesh price to ConnectWise: Include Mesh pricing data in ConnectWise synchronization when pricing should be maintained from Mesh.
-
Use cancellation date on additions: The cancellation date on an agreement addition defines the final day that a service or product addition is active and associated with a customer's billing.
-
Addition Creation Mode:
-
-
Create addition for new month: A new addition will be created for each month's cycle; existing additions will not be reused.
-
-
-
-
Set Cancellation date (last day of month): Each created addition will have the cancellation date set on the last day of the month.
-
-
-
-
Reuse addition (create if missing): Existing additions will be updated with the updated usage for the month. If no addition is found, the integration will automatically create one. The usage is updated every first day of the new month.
-
-
Billing Month:
-
-
Current month: Additions will be updated with the usage for the current month.
-
-
-
Next Month: Additions will be updated for the following month.
-
-
Reset Integration: Reset the current PSA integration so a different provider or a new ConnectWise Manage configuration can be setup.
Common reasons to update existing mappings include:
-
A new Mesh customer has been added.
-
A ConnectWise customer/client was renamed or replaced.
-
A customer was intentionally excluded during initial setup and now needs to be synchronized.
ConnectWise integration. -
Invoice tracking shows an unmapped or unexpected invoice status.
After changing mappings, select Save Mappings and run Sync Now if you need the update reflected in ConnectWise immediately