This guide explains how to create a customer account in Mesh, covering processes for free trials, Not-For-Resale (NFR) orders, and buy-now orders.
Tip: If this is your first time setting up a customer in Mesh (or even if it’s not), it is worthwhile familiarizing yourself with our Before You Start Checklist
🕐 Completion Time: 2 minutes
Video Guide
Written Guide
Step 1: Open the new customer modal
In your MSP portal, navigate to Customers → New.
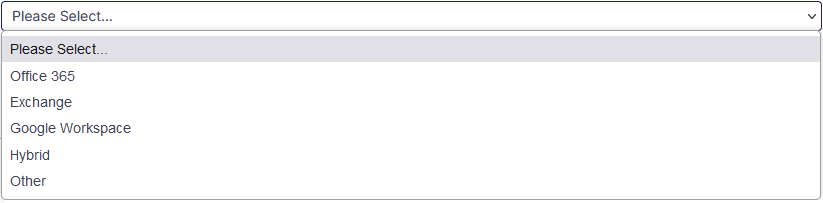
Step 2: Select your mail platform
Select "Mail Platform" from the dropdown menu.
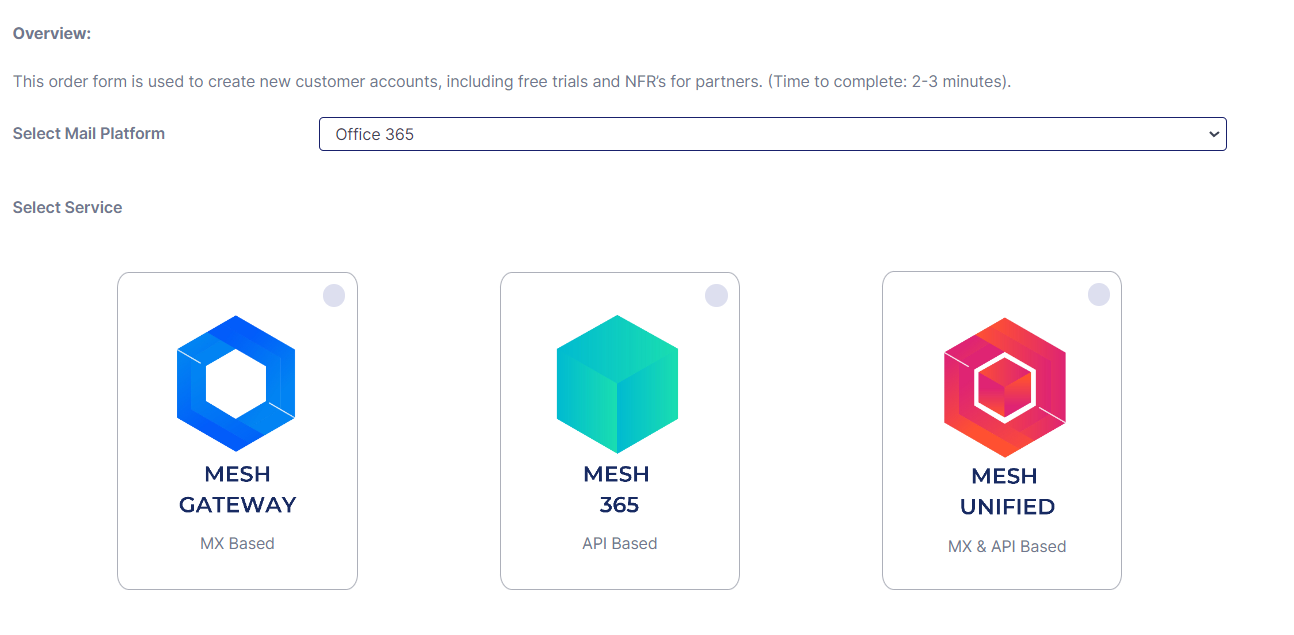
Step 3: Select service
Select the Mesh "Service" you wish to order:
-
Mesh Gateway (MX-based)
-
Mesh 365 (API based)
-
Mesh Unified (MX based and API based)
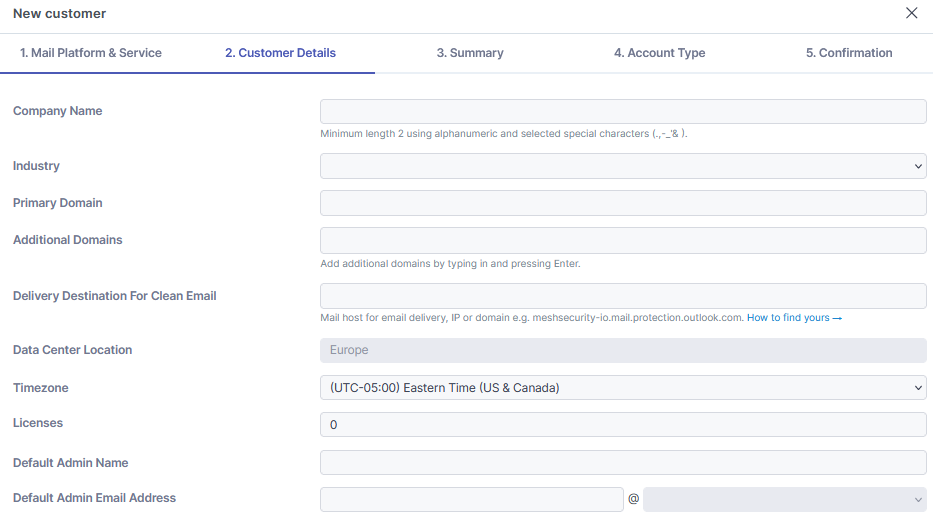
Step 4: Enter your customer’s information in the required fields
Ensure there are no typos in “Delivery Destination For Clean Email”.
-
Licenses - If you are syncing from Microsoft 365, this will be automatically updated. Licensing Explained
-
Default Admin - The default admin is a system requirement. It is not a billable license. It does not need to be a real mailbox.
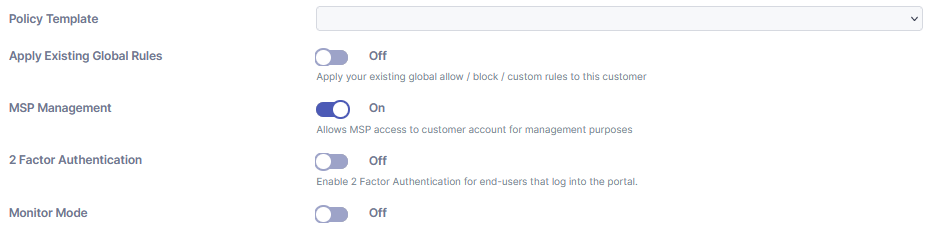
Step 5: Additional customer settings
-
Policy Template - Select the policy template you’ve created.
Tip: Review our best practice for each service
-
Apply Existing Global Rules - Apply existing global rules to this new customer account.
-
MSP Management - Allows the MSP to login to the customer account for management purposes. If this is disabled, the customer account can be managed by anyone with an administrator role at customer level.
-
Two-Factor Authentication - This will force administrators/users that log into the customer-level portal to configure two-factor authentication. It does not affect the login as function from MSP level.
-
Monitor Mode (Mesh 365 Only) - Mesh scans all emails and provide verdicts, but no actions are taken.
It can be beneficial to start in monitor mode for a few days. See benefits of Monitor Mode
Step 6: Account Type
-
Buy Now will start the billing period immediately.
-
Free 14-days trial automatically converts to billable after 14 days unless terminated.
-
NFR (Not for resale) is only for use on your MSP domain (maximum of 50 licenses).
Once the form is submitted, the account will be created instantly, and you will receive a confirmation email. The next step is to complete the installation.