This guide outlines how to create an outbound connector in Microsoft 365 in order to facilitate the routing of outgoing email through Mesh.
We recommend you consult Microsoft’s official documentation to ensure the setup is relevant to your environment.
Using Exclaimer? Please use this guide instead →
Connector Setup
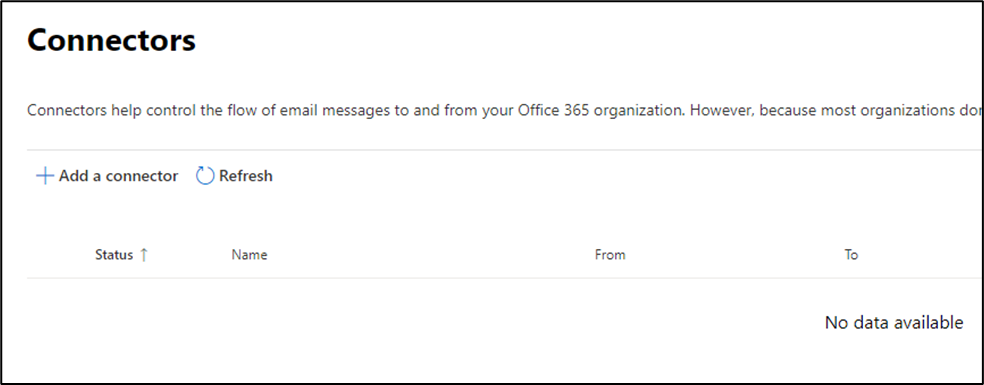
Step 1: Connectors page
Navigate to the “Connectors” page on your Exchange Admin Console.
Step 2: Add a connector
Select “Add a connector”.
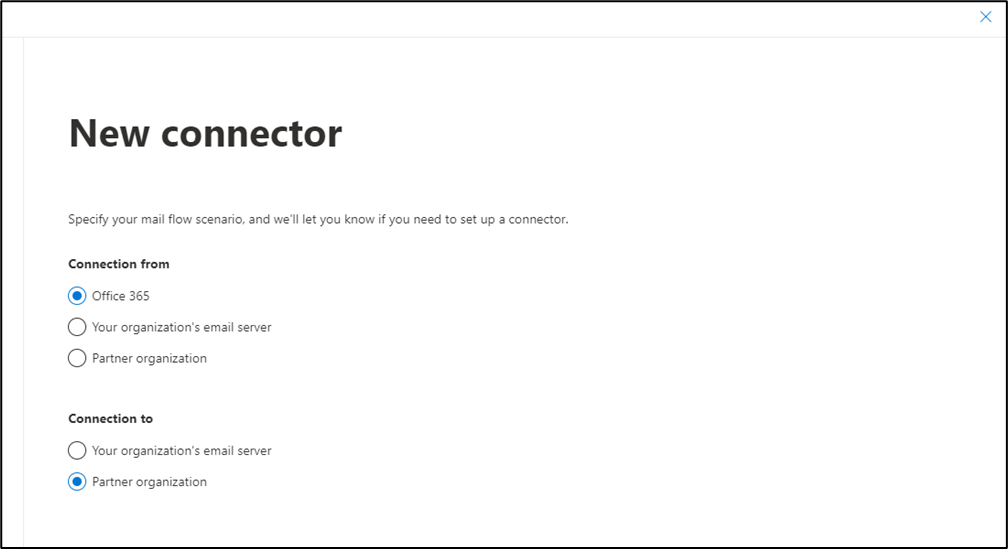
Step 3: Specify mail flow
Select “Office 365” under the “Connection From” option. Select “Partner organization” under the “Connection to” option.
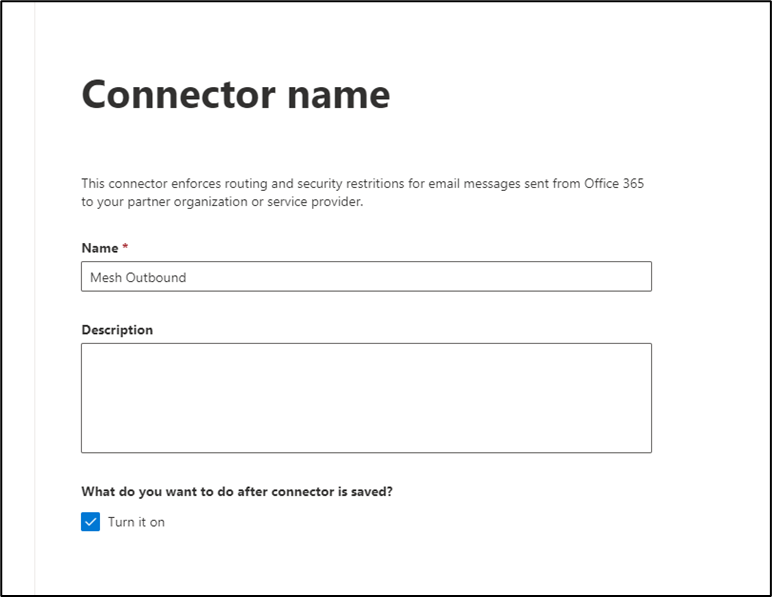
Step 4: Connector name
Give the connector a name and optionally a description. Ensure the “Turn it on” box is checked.
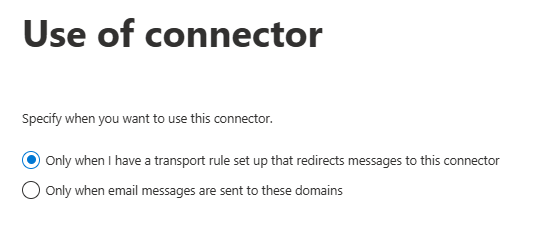
Step 5: Use of connector
Select the “Only when I have a transport rule set up that redirects messages to this connector” option.
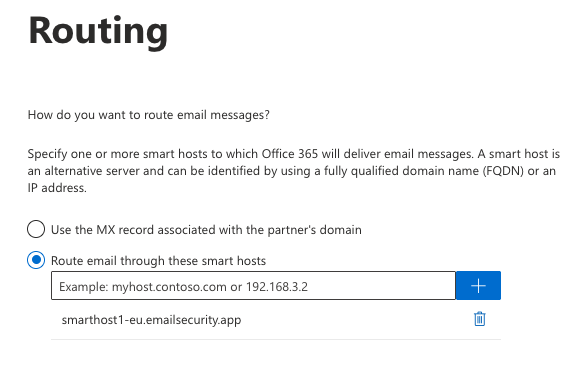
Step 6: Routing
Select “Route email through these smart hosts”.
Enter the smart host specific to your region.
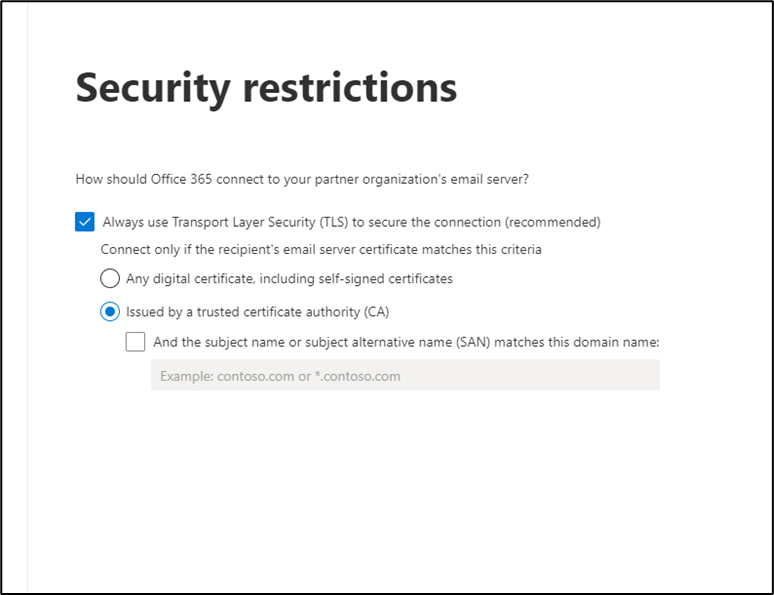
Step 7: Security restrictions
Select “Always use Transport Layer Security (TLS) to secure the connection” and “Issued by a trusted certificate authority (CA)”.
Step 8: Validate connector
The next step will present a validation screen.
For an outbound connector, the email address should be external to the tenant being configured. If the testing email address is internal, Microsoft 365 will not use the smarthost.
Due to recent changes within Microsoft’s infrastructure, an error “502 5.3.3 Command not implemented” may be generated when attempting to connect to our smarthost. If you receive this error, please skip the validation step, and proceed to manually verify outbound email is routed correctly.
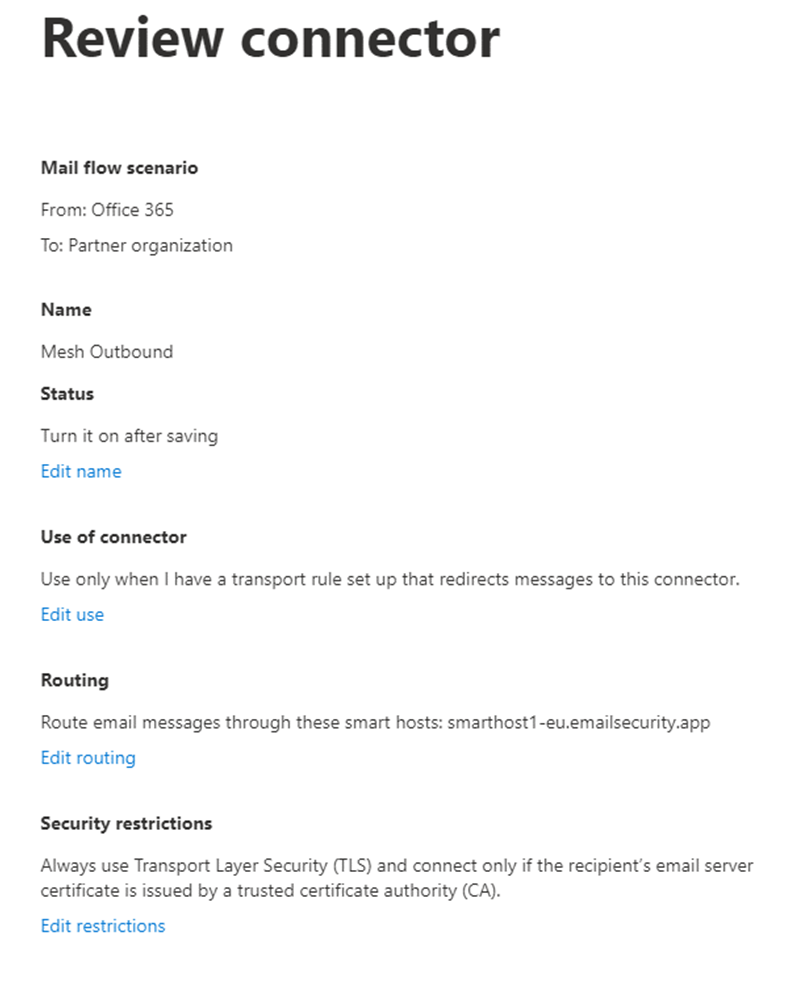
Step 9: Review connector
Review the details you have entered and click save. Your connector list will now be updated to reflect the change.
Transport/Mail Flow Rule Setup
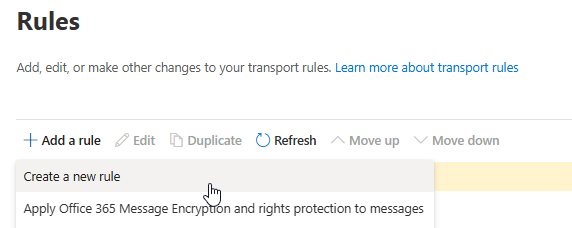
Step 1: Rules page
Navigate to the “Mail Flow” section in your Exchange Admin Center and select “Rules”.
Step 2: Create a new rule
Click “Add a rule” and then “Create a new rule”.
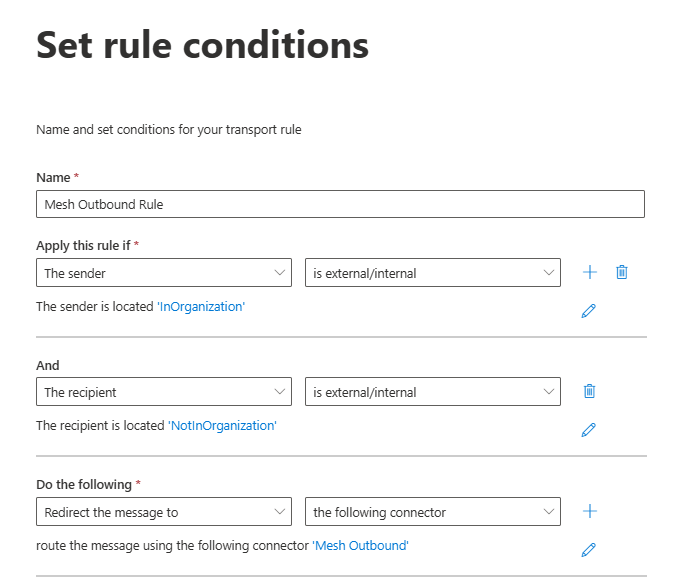
Step 3: Rule conditions
Give the rule a name and apply the following rule conditions.
-
The sender is external/internal → Inside the organization.
-
The recipient is external/internal → Outside the organization.
-
Redirect the message to → the following connector → select the Mesh Outbound connector you created.
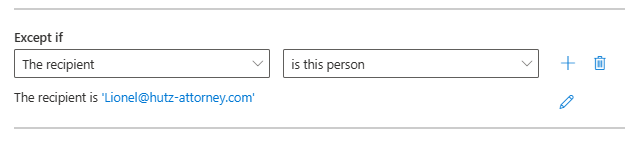
Step 4: Exceptions
If you need to add exceptions to emails that should not pass through our smarthost, the “Except If” condition facilitates this.
For example, if configuring an autoforward, please consult our Outbound Smarthost guide to check if this step may be necessary. https://meshsecurity.atlassian.net/wiki/spaces/THC/pages/863272974/Outbound+Smarthost#Auto-Forward
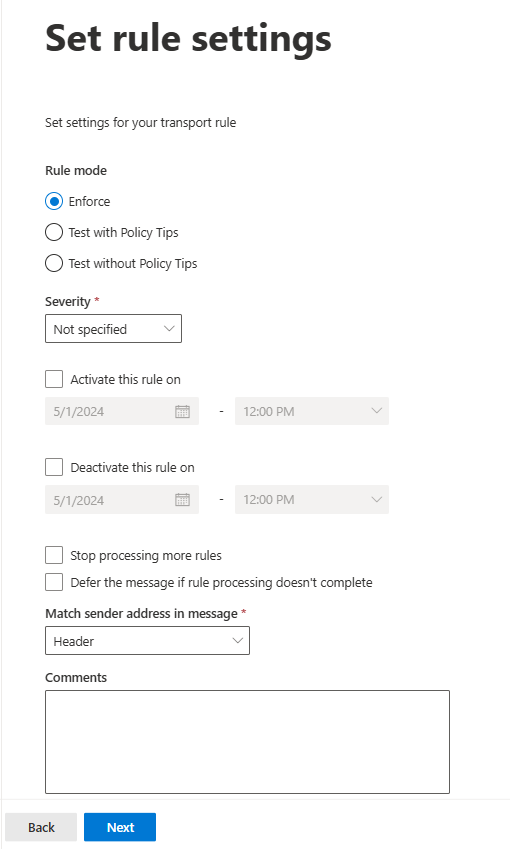
Step 5: Set rules settings
Ensure the “Enforce” is selected.
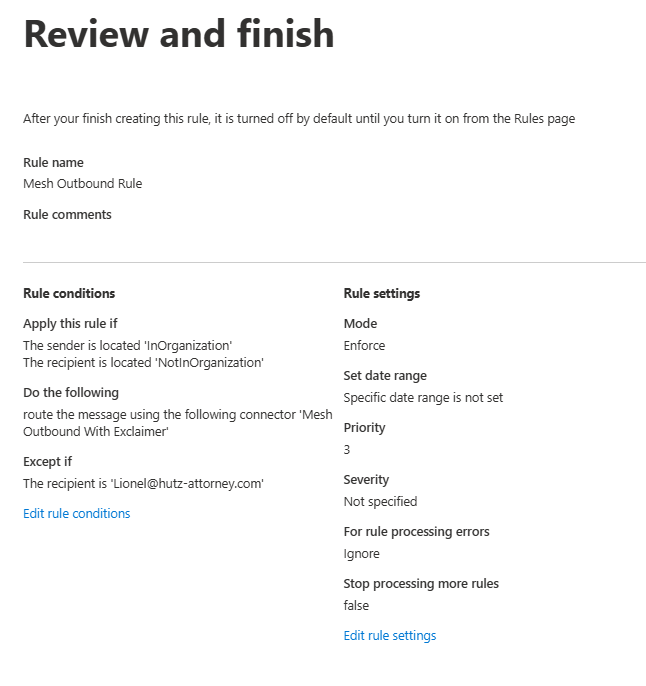
Step 6: Review and Finish
Review the details you have entered are correct.
You’re all set.
Related Articles