

To ensure only email filtered by Mesh is delivered to your Microsoft 365 / Exchange tenancy, you need to create a connector for Mesh in Microsoft 365 / Exchange.
It is recommended that you consult Microsoft’s official documentation to ensure the setup is relevant to your environment.
Important: Only complete this step after you point your MX records to Mesh. We recommend waiting 24 hours to allow for DNS propagation.
Important: If you are moving from another Secure Email Gateway, you will likely have an existing connector in place to reject emails that aren't sent from a specific IP range.
You will need to remove this before changing MX records to prevent clean email filtered by Mesh from being rejected
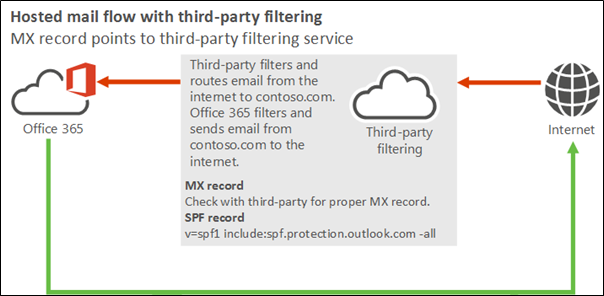
This guide covers the following scenario:
Step 1: Connectors page
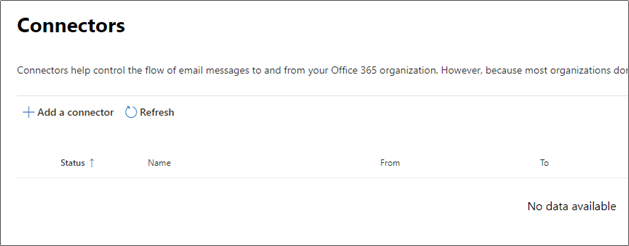
Navigate to the "Connectors" page on your Exchange Admin Console.
Step 2: Add a connector
Select “Add a Connector”.
Step 3: Specify mail flow
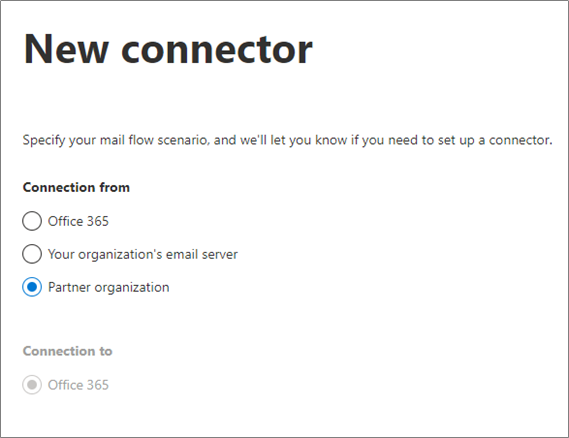
Select “Partner organization”. It will automatically select Office 365 as the “Connection to”.
Step 4: Connector Name
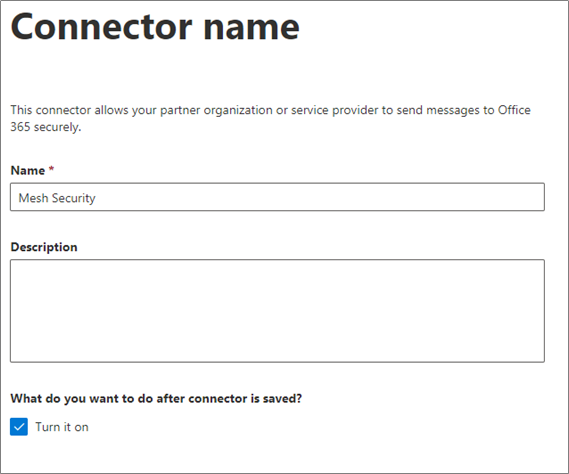
Provide a name to connector and a description if you so wish. Check the “Turn it on” box.
Step 5: Use of connector
Enter the “*“ wildcard to indicate to always use the connector when receiving emails inbound.
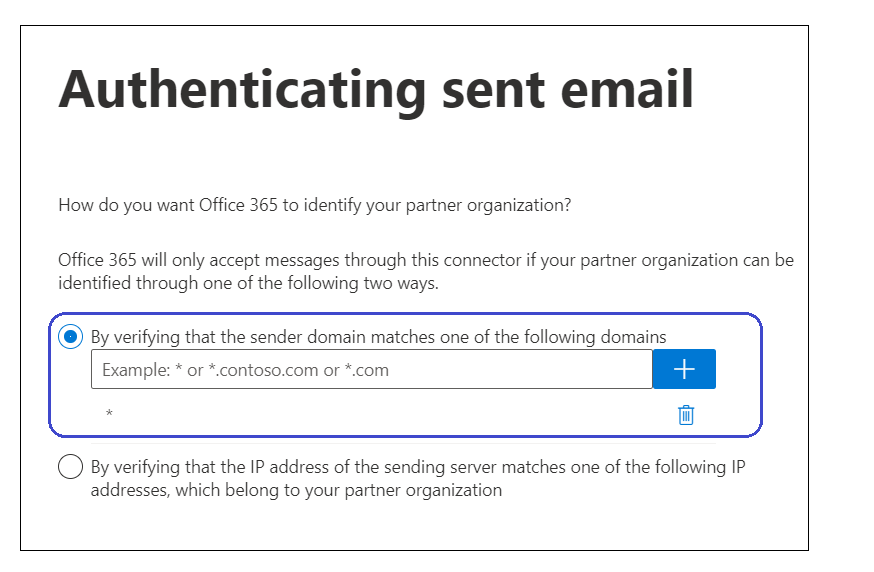
Step 6: Security Restrictions
Ensure the “Reject email messages if they aren't sent over TLS” is ticked. Ensure the “Reject email messages if they aren't sent from within this IP range" is ticked.
The IP ranges for your region can be found here. This setting ensures that emails cannot bypass our filtering/be delivered directly to your Microsoft 365 environment.
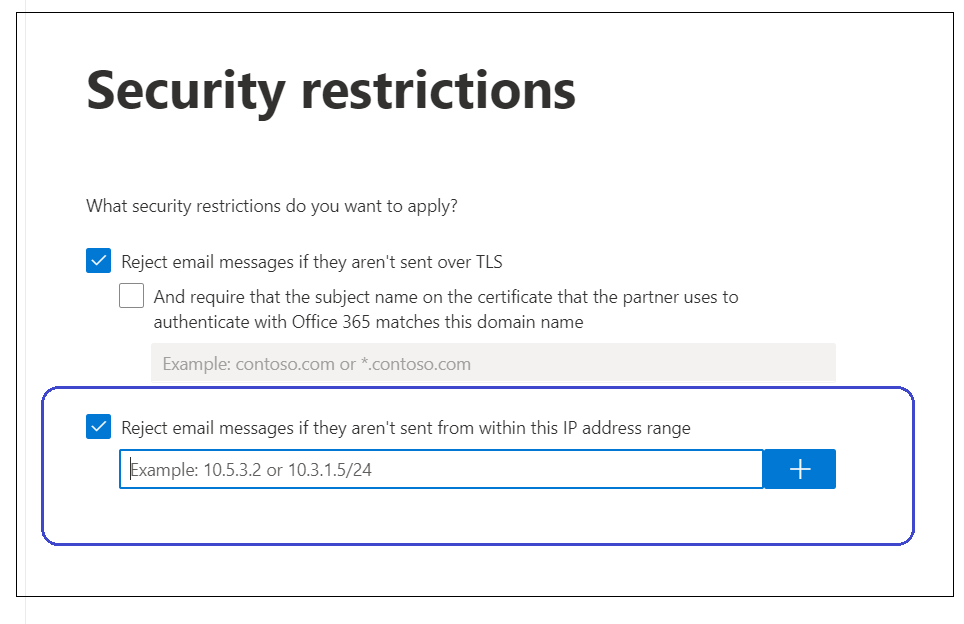
The IP shown here is Microsoft’s example. Please ensure that you populate the box with the Mesh IP ranges for your region.
Step 7: Review Connector
Review the details you have entered and click save. Your connector list will now be updated to reflect the change.
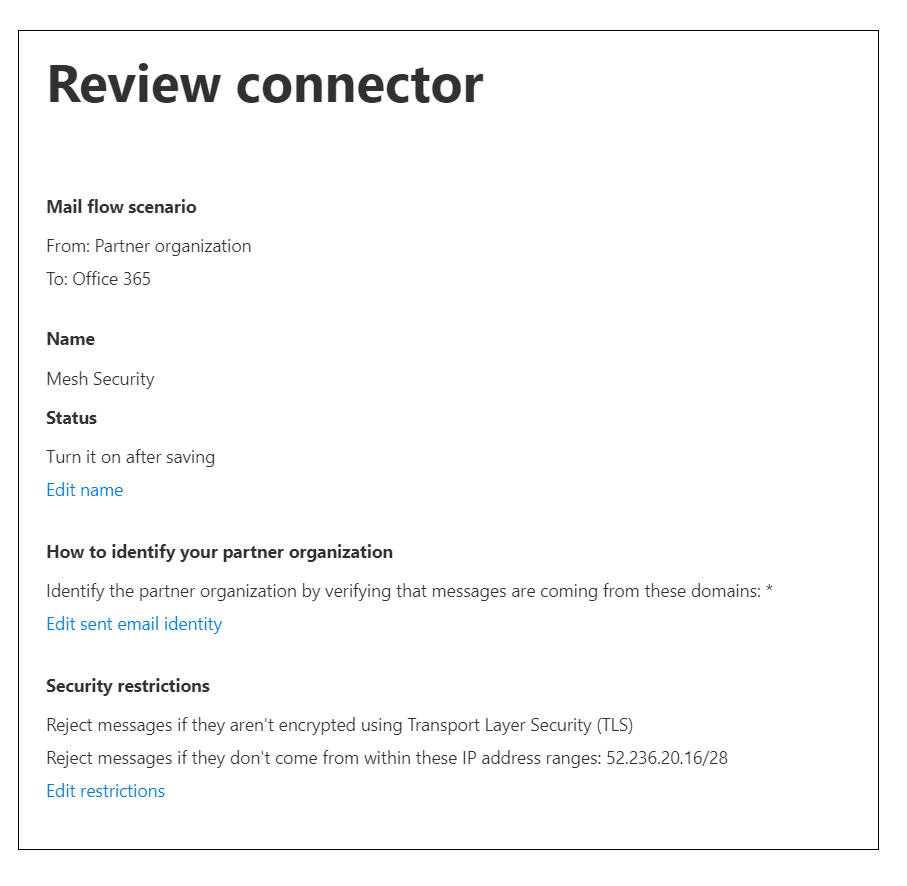

You’re all set!